Tips to Ensure Vitality in Woody Container Plants
Why repot?
Although most perennials, shrubs, and trees are better off planted in the ground, planting in containers is a viable option to add greenspace and aesthetic value to your home’s interior and exterior when space is limited. As container plants mature, their biomass increases both above and below the soil line. Within the container, the roots grow outward and down to collect more water and nutrients. This subsurface growth also serves to increase the structural support for additional plant growth occurring above the soil surface. Most container plants tend to become root–bound. Being root–bound is a condition where the roots outgrow the container’s volume, overlap each other, circle around the bottom of the container, and turn to grow back up and/or against the container wall. Because of the spatial limitations, container plants also tend to dry out quicker than their in-ground counterparts. These conditions can cause a variety of issues and generally lead to stunted growth and poor plant health. To prevent this from happening, it is important to make sure the root system is well–dispersed in a healthy volume of soil in an adequately sized container. Spring is a good time to repot and make this transition.

Where to start?
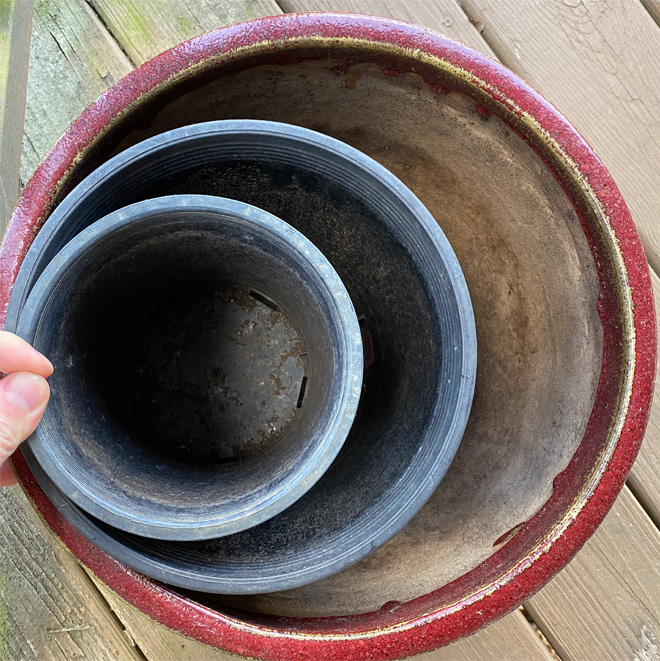
For most flowering perennials and biennials, such as gaillardias, hostas, coneflowers, and black-eyed Susans, as well as most woody plants, you should select a container that is large enough to accommodate 2 years’ worth of additional root growth. When repotting, a general rule is to choose a pot 3 to 4 in. larger in diameter than the current container. Factors to consider when selecting a new pot include whether you want to repot every year, what kind of plant you are repotting, the growth rate of your plant, and environmental conditions. Many plants found at garden centers are sold in 1-gallon containers. These pots are typically 5 to 6 in. in diameter. The figure on the left shows a 1-gallon pot inside of a 9-in. diameter pot, which is inside of a 13-in. diameter pot. With perennials such as coneflowers, an appropriate transition would be moving the plant from the 1-gallon pot to the 9-in. pot this year, then to the 13-in. pot the following year.

Next Steps
Drainage
Prior to placing any soil in your new pot, be sure there is adequate drainage in the bottom of the container. Few plants can tolerate waterlogged soil and wet roots for a long period of time. Not only does excess water cut off the air supply to the roots, but also it can kill the beneficial microorganisms in the soil, lead to root rot, cause odors because of anaerobic bacteria, and facilitate a host of other ailments including the death of the plant. Many planting containers have knockout tabs in the bottom of the pot. If these aren’t present, drilling holes in the pot will allow for adequate drainage.

Figure #. Caption
Plant Position
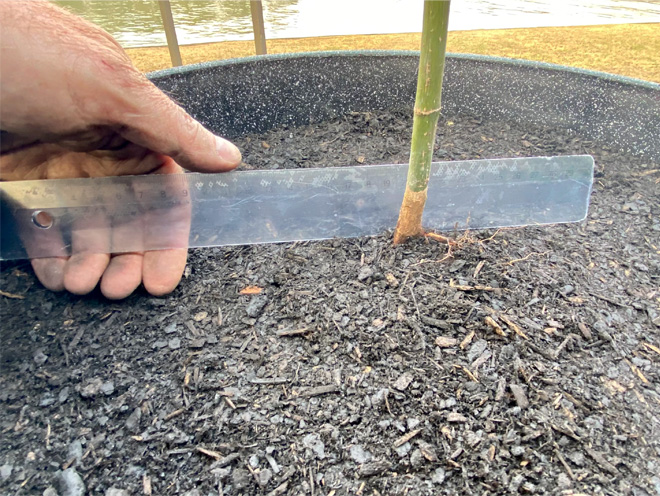
Before you begin filling the container with soil, identify the plant’s root crown. The root crown is located where the first lateral roots start to appear. Estimate the approximate position the plant will be in when it is planted in the container in order to have the root crown at or slightly above the soil level. Positioning the root crown above the soil level is correct for most plants, but it is especially important for trees. The ruler in the image is pointing at the first lateral root off the trunk. Be sure to position the root crown of your plants above the soil level—especially if you are planting trees.

Soil Fill
The next step is to begin filling the container with soil and lightly firming it as you go. At the desired soil depth, build a mound in the center of the soil. This mound will be where you place your plant, and it will help you arrange the roots of the plant. The roots should be placed around the outer edge in a lateral, radial, and slightly downward manner.

Examine Roots
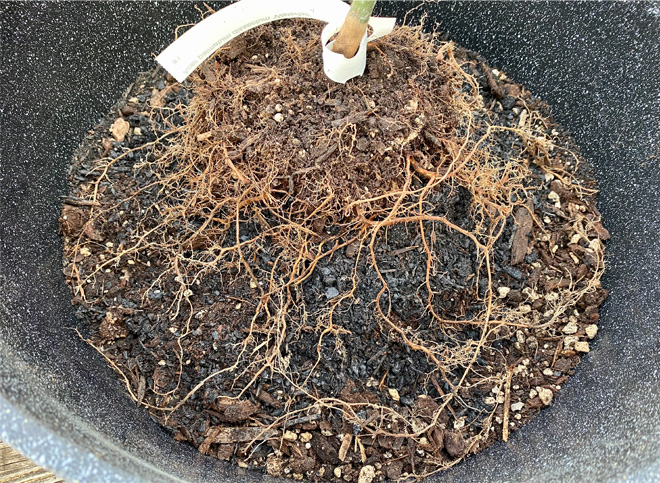
When the new container has enough soil, carefully remove the plant from its original container. Do not grab it by the top and pull it out of the container. Instead, place your hand on the soil around the base of the plant, turn the container over, and let the plant fall into your hand. Carefully inspect the root system and look for any damage or disease. Notice where the roots are crowded, overlapped, and tangled. Damaged or diseased roots should be removed.

Finishing touches
Root Pruning
When the plant is out of the container, gently separate the roots. If the plant is strongly root–bound (roots are tightly circled), slice off the outer 1/2 in. of soil and root mats. Trim the circling roots and any roots growing upward. Save as much of the living root mass as possible to assure faster recovery and better growth.

Careful Arrangement
When the roots are separated, place the plant on the top of the soil mound. Arrange the roots away from the stem base and soil mound to provide for plenty of lateral spacing. Be sure to keep the roots from overlapping and from being twisted around each other as much as possible. Correct root placement will ensure proper movement of water and nutrients as the plant grows.

Backfill
Once the roots are spread apart, begin adding soil on top of them. Firm the soil with slight or light pressure as the soil is added. When you are done adding soil, be sure the root crown is still slightly above the soil level. This will prevent water from accumulating around the root crown and stem base and allow plenty of air exchange through the soil and root system.

Protect & Water
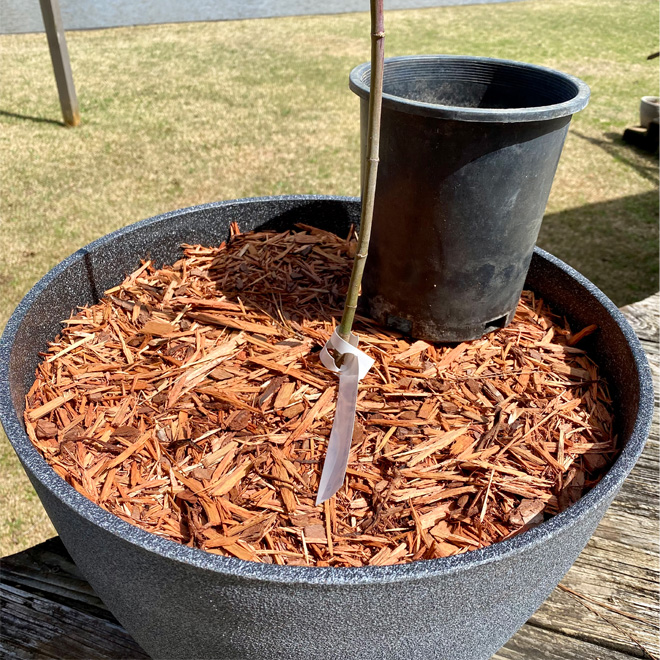
When finished, you can add a thin layer of soft soil-surface covering of your choice (mulch, leaves, straw, pine bark, etc.), but be sure not to cover the root crown. Gently water your plant and all around the container’s soil surface. The plant should now be ready for another year or more of growth.

Status and Revision History
Published on Apr 14, 2022


