 Photo: Malgorzata Florkowska
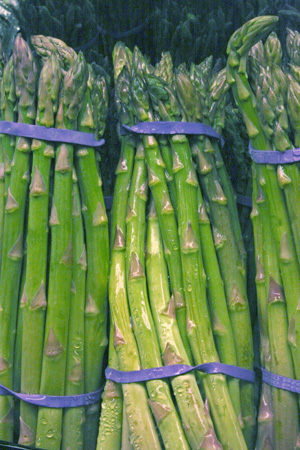
Asparagus (Asparagus officinalis) is a hardy perennial that grows wild along roadsides in some areas of the country. It is native to the Mediterranean and has been cultivated for more than 2,000 years. Asparagus produces shoots from buds formed on a rooted crown. The shoots, known as spears, have large-scale attachments that are actually small leaf-like branches. A bed of asparagus established correctly can last for 30 years, and asparagus will be one of the first crops in the spring to harvest. Asparagus is healthy to eat and is rich in Vitamin B, calcium, magnesium, zinc and dietary fiber. For gardeners who are willing to put in a little effort and have some patience, asparagus can be a rewarding and delicious vegetable to grow.
Varieties
 Photo: Bob Westerfield
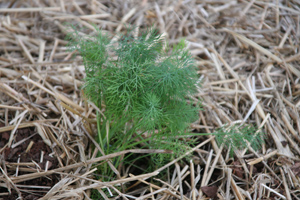
Asparagus is a dioecious plant, meaning it produces male and female flowers on separate plants. Female plants do not live as long or produce as well as male plants. Both sexes flower, but only the female plant produces small, red berries early in the fall. These berries can become a problem if they sprout and overcrowd the bed.
Choosing the best variety available will help ensure a long, healthy stand of asparagus. Generally, male-only varieties are selected, as they produce thicker stems and don?t go to seed. Varieties such as Jersey Giant, Jersey Prince, Jersey King, Syn 53, Syn 4-362, Viking KBC and UC 157 are all good male hybrids that will produce a large yield. All of these varieties are cold tolerant and resistant to rust and fusarium.
Soil Preparation and Culture
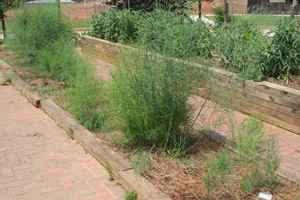
Plant asparagus in the spring as soon as the soil temperature reaches 60°F. Select a site that receives eight to 10 hours of sunlight. Heavily amend the soil with organic matter such as compost, manure, leaves or bagged topsoil. Asparagus does not like heavy clay soil. Soil pH should be between 6.5 and 7.0 for best results. Soil testing can help determine if the soil pH needs to be adjusted and give specific recommendations for applying lime, if it is needed. Asparagus can also be planted in raised beds that are 8 to 10 inches high.
Buy one-year-old healthy crowns from a reputable source. Open a trench 6 inches deep and 15 inches wide (the length of the prepared bed). Space the crowns 9 to 12 inches apart with the buds pointing up, in an upright, centered position, slightly higher than the roots. Spread the roots in a uniform pattern around each crown. Cover the crown with 2 inches of soil and water the plants thoroughly.
Gradually add soil to the trench as the plants grow during the first year and keep the trench free of weeds. Mulch will probably be the most effective way to control weeds and to help conserve moisture. If you have to use herbicides, select one that is specifically labeled for asparagus. Use trickle irrigation to water the plants, in the absence of rain, providing approximately 1 inch of water every week. Raised beds will typically require more moisture due to their improved drainage. When irrigating, the soil should be moistened to a depth of 6 to 8 inches to allow water to reach the plants? root system.
Fertilization
 Photo: Bob Westerfield
Soil test the bed to find the specific nutrient requirements of your crop. In general, asparagus responds well to a balanced fertilizer at planting and early in the growing season. In the absence of a soil test, apply 2 pounds of 10-10-10 per 100 feet of row. In addition, apply an extra half pound of 34-0-0 or equivalent per 50 feet of row after harvesting asparagus.
Harvesting
 Photo: Bob Westerfield
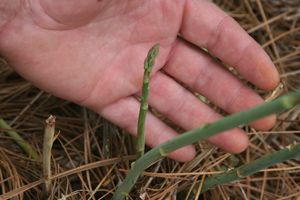
Begin harvesting asparagus the second year after planting for a period of about three weeks. The plants at this stage are still expanding their root system and removing all of the spears will weaken the plants. Asparagus at this stage will be about the size of a pencil.
The third and fourth year after planting, harvest the spears for a period of one month, and then allow the plant to grow and expand its root system. After that, harvesting can continue for six to eight weeks during the growing season. However, stop the harvest when asparagus spears become spindly and noticeably smaller.
For highest-quality asparagus, harvest in the morning when the temperature is cool. Harvest the spears when they are 5 to 8 inches long by cutting or snapping. If you use a knife, place it into the soil at the base of the spear and cut it. Use caution when cutting, as this may damage those spear tips that have not yet come into view above the ground. To snap a spear, hold it near the base, and bend it toward the ground to break it at the lowest point. In late winter, after they have turned brown, cut the foliage back to 2-inch stubs prior to the new spears emerging. Allowing the fern-like foliage to stay on the plant through the season allows nutrients to be transported by the foliage into the crowns for the following season?s growth.
Storing and Using
Immediately after the harvest, put asparagus spears into cold ice water to cool them down. After a few minutes, remove the asparagus from the water bath and place the spears upright in a jar containing 1 to 2 inches of water. Cover the tops of the asparagus with a plastic bag, and store the jar in a refrigerator. Asparagus can last for several days when stored in this manner.
To prepare asparagus, wash them under running water and trim about an inch off the ends. Asparagus can be boiled, grilled, steamed, roasted or eaten raw.
Problems
Home gardeners can sometimes run into a few problems when growing asparagus. Asparagus beetles, asparagus rust, crown rot and fusarium crown rot can be problems for the home gardener when growing asparagus. To avoid these problems, always follow sound cultural practices, including removal and destruction of all plant refuse, proper irrigation practices and weed control. With good preparation and continued care, any home gardener can grow and enjoy fresh asparagus for many years to come.
Status and Revision History
Published on Jan 23, 2013
Published with Full Review on Nov 02, 2015
Published with Full Review on Oct 31, 2023


