- Garden Location
- Making a Plan
- Seed and Plants
- Soil Testing and Liming Recommendations
- Soil Preparation and Improvement
- Planting the Garden
- Mulching
- Watering
- Pollination
- Cultural Tips
- Garden Herbs
- Disease and Insect Control
- Harvest High-Quality Produce
- Planting Chart
A well-tended, fruitful garden is a delight. It can supply you and your family with a variety of nutritious, healthful vegetables to be enjoyed fresh or preserved for later use. Gardening can also be a rewarding hobby, a project for 4-H members and a way to improve your physical fitness. Although it’s true that we can buy quality fresh, frozen or canned vegetables in supermarkets, many of us are turning to gardening to supplement our store-bought food.
Garden Location
Your garden’s site location is very important. When possible, locate the garden in full sunlight, near the house, on good soil and near a water supply.
Sunlight
Most vegetables need full sunlight for growth and development. Plant leaf crops such as broccoli, collards and spinach in areas likely to be in partial shade. Don’t plant any vegetable in complete shade. Large hedges, hedgerows and trees not only create too much shade, but they also compete with the garden for moisture and nutrients.
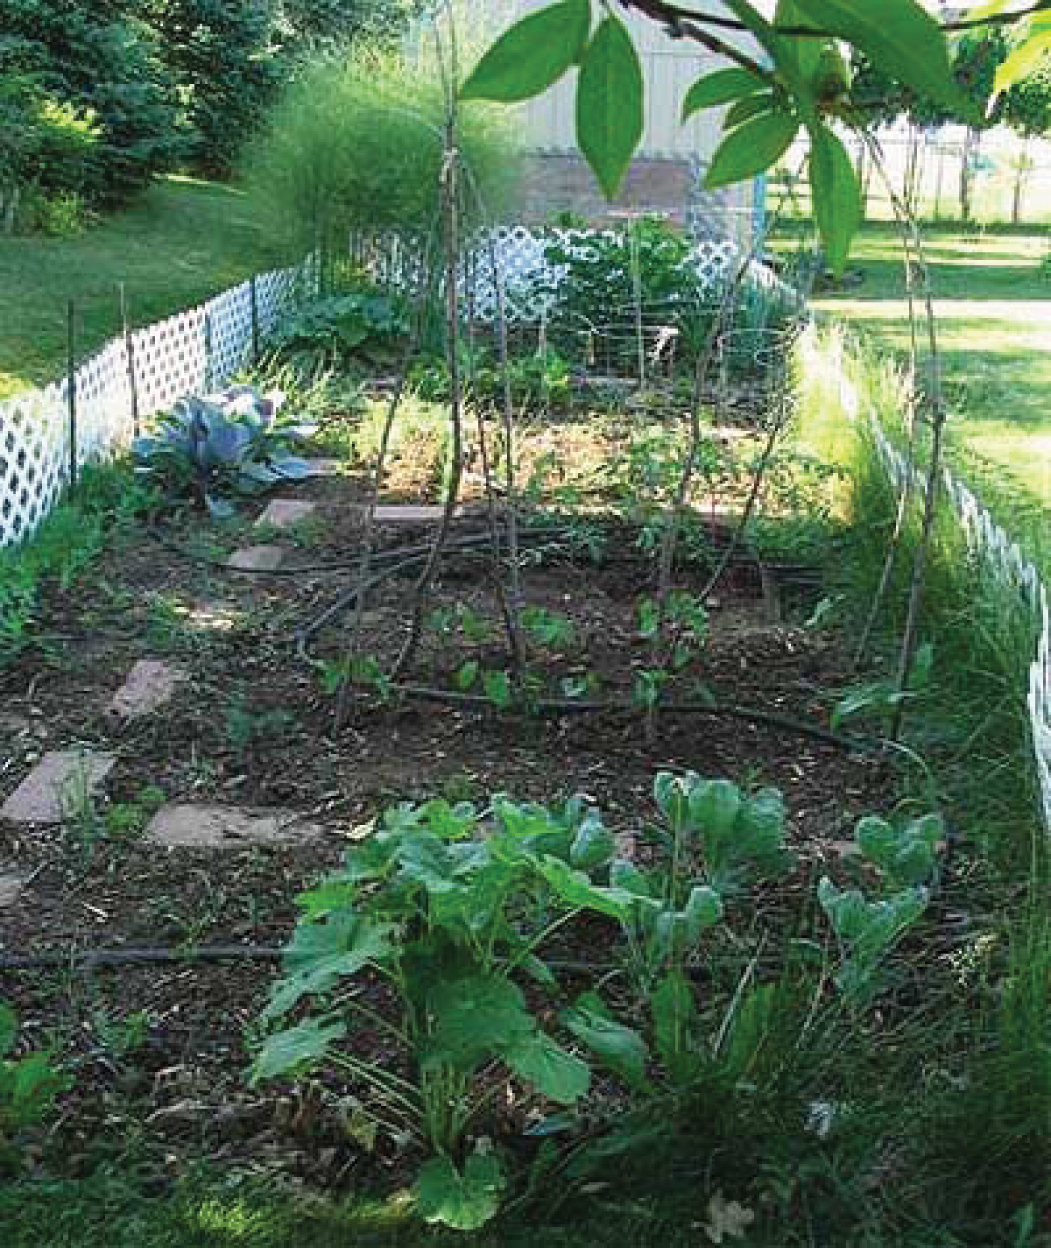 Trees and large shrubs shade the garden and compete for moisture and nutrients.
Nearness to the House
Locate the garden near your house so you can observe it regularly. Being close to your garden will help you notice insect, disease and weed problems and let you take necessary control measures before they can cause serious damage. A convenient location will also allow you to spend short periods of spare time tending to garden chores or harvesting the fruit.
Soil
When looking for a garden site, keep in mind that the exact soil type is less important than factors such as high fertility, good internal drainage, ease of tilling, good moisture-holding capacity and deep topsoil. Try to avoid areas infested with johnsongrass, nutgrass and other troublesome weeds; areas with rock ledges; and areas underlain by a hardpan or hard shale. Soils can be amended with organic matter to improve the area.
Water
You will get only moderate results if you try to grow a garden without watering it as needed. Mulches and organic matter will improve the soil’s moisture-holding capacity and reduce evaporation loss; however, they will not guarantee an ample supply of moisture at all times. If possible, locate the garden near a good water supply so it can be watered as often as needed.
Making a Plan
Select the Crops
While you will want to select vegetables that provide a good supply of vitamins and minerals, be sure to plant vegetables your family likes. The size of your garden and the suitability of certain types of vegetables to your area will limit the crops you choose. Remember that planting large-growing crops such as corn or melons in a small garden will reduce the number of other vegetables you can plant.
If you plan to can or freeze surplus produce, be sure to choose varieties that process well. For information on canning or freezing vegetables, contact your county Extension office by calling 1-800-ASK-UGA1.
Make a Map
Sometime during the winter, make a map of the garden you want to grow. Gather seed catalogs and variety recommendations, then put the garden plan on paper. Include what kinds of vegetables you will plant, the distances between rows and between plants, the amount of fertilizer to use and the time of planting.
Plant perennial crops such as asparagus, strawberries or other small fruits to one side so they will not interfere with each season’s garden preparations. Plant fall-growing crops on the north side so they will not shade the other plants.
Arrange the rows according to the planting dates of various crops, so only a narrow strip needs to be prepared for the early plants. The rest of the garden may be prepared as needed. Try to arrange the rows in an east/west orientation to capture the most sunlight.
Keep all of your garden’s space fully occupied throughout the growing season. In parts of Georgia, it is possible to grow vegetables every month of the year. By intercropping (planting another kind of vegetable between the rows of an earlier-maturing kind), you can make better use of available space. Plant late crops (those normally transplanted after danger of frost has passed) between rows of early peas, lettuce, spinach and the like.
Successive plantings of in-season crops can be made so these vegetables will be available throughout the growing season.
List garden chores to do each month; with a garden map and a garden calendar, you’ll find it easier to carry out the various jobs on time. See University of Georgia Cooperative Extension Circular 943, “Vegetable Garden Calendar,” for more information.
Plan a Fall Garden
Make new plantings in July, August and September to enjoy fresh vegetables well into the fall months. Fall-grown vegetables are usually of very high quality. If you supply water as needed, use pesticides properly and fertilize according to label recommendations, you will be rewarded with tender vegetables in a season when few people are enjoying such delicacies.
Equipment
The equipment you will need largely depends on the size of your garden. If you have a small garden of a few hundred square feet, a hoe, an iron rake, a spading fork, a round-nose shovel and a pesticide applicator may be all you need. In larger gardens, you may need additional tools such as a wheel cultivator, a garden tractor or a tiller. Be sure all of your equipment, especially sprayers and dusters, is reliable and in good repair.
You will also need several stakes and string or rope to mark off rows. For irrigation, you need a garden hose and sprinkler, or better yet, drip tubing or soaker hoses, which are more efficient.
Keep a Record
For every vegetable you plant, write down the name of each variety, the seed source, the lot number (if available), the date planted and the date harvested. Also write down your evaluation of the crop. Keep records on any chemicals used, fertilizer analyses and anything of personal interest. All of these notes will help you plan next year’s garden a little more efficiently.
 Your garden record might look something like this.
Seed and Plants
Plant Recommended Varieties
Numerous vegetable varieties are available, and new and better varieties are constantly being developed. Choosing the right variety for your individual situation can be confusing. Gardeners are encouraged to stick with proven recommended varieties for major plantings. Try new varieties on a small scale to determine their worth. They may or may not prove to be superior to the older varieties. Things to consider when selecting a variety include:
Adaptability
Some varieties do well in either north or south Georgia, but not both. Others may do well in both areas. The microclimate (“climate” of the plant’s immediate vicinity) may also affect the success of a particular variety.
Earliness
The number of days from planting to maturity can vary considerably from one variety to another. Successive plantings of the same variety, or several varieties, with different maturity dates can be planted at one time to extend the harvest season.
Maturity
Some varieties are determinate, which means they only produce one crop for harvesting. Other varieties are indeterminate, which means they can continue producing over a period of time if the plants are properly cared for and the fruit is harvested as it matures.
Productivity
Even with the same care, some varieties yield considerably more than others. Usually hybrids out-yield non-hybrids.
Quality
Varieties differ greatly in flavor, texture, keeping ability, and adaptability to canning and freezing. The final intended use may influence which variety you choose.
Disease resistance
Resistance to leaf- and soil-borne diseases as well as nematodes is available in some varieties. Resistance is an important consideration where these problems are known to exist or where proper prevention measures may not be taken. A current list of recommended varieties is available at your county Extension office (also see UGA Cooperative Extension Circular 963, “Vegetable Gardening in Georgia”).
Buy Wisely
Buy seed for your garden from a reputable dealer. Like other merchandise, seed quality may vary at different seedhouses. Make sure the kind, variety, percentage of germination and date of testing are marked on each package. Cheap or bargain seed may be a definite liability since they can cause a garden failure due to poor germination, impure seed or mixed varieties. The best seedsmen usually offer treated seed of good quality and label them as to the treatment given. Do not save your own seed unless they are of a desired variety that is no longer available. Do not save seed from hybrid plants.
Note: Buy certified plants for your garden. Always examine the roots for the presence of small knots or galls, which indicate root-knot nematodes. Discard all infected, weak or damaged plants.
Order Early
Plan your garden during the winter months and place your seed order early so there will be no delay in getting the seed you want. Many times, the newer, more popular varieties sell out completely and you may have to settle for alternative choices.
Grow Plants at Home
Growing your own plants helps ensure healthy, disease-free plants of the desired variety when you need them, but it is often difficult to get a good stand of delicate plants from seed. You can increase earliness, economize on space and lengthen the growing season of many crops by setting out plants instead of sowing the seed directly in the garden. Seed sown indoors in boxes, in hotbeds or in coldframes will produce very good plants early in the season. If the seed are sown in a small container, the seedlings can be transplanted to peat pots, plant bands or other suitable containers and grown in these until transplanted in the garden. Tomatoes, peppers, eggplant, early cabbage, cauliflower, broccoli and early head lettuce are best started this way.
The seedbed and potting soil should be sterilized to protect against harmful soil-borne insects and disease-causing organisms. Treat small lots of soil can by placing moist soil in a shallow pan and baking it for 1 hour in an oven at 210º F to 215º F. You can also place soil in a canning retort and steam-sterilize it for 1 hour at 15 pounds pressure.
Seed can be germinated and seedlings started in a box, pan or flowerpot filled with planting medium and placed in a window. Vermiculite, sphagnum moss, peat moss, sand or soil are commonly used to make the medium. Commercially prepared peat pellets or cubes are also available.
If your plants grow too tall and spindly, they are not receiving enough light and you should place them in a spot where more light is available or transplant them to give each plant more room and more light exposure.
Soil Testing and Liming Recommendations
Soil testing is an important practice for the home gardener. Soil test results indicate the amounts of residual fertilizers in your soil and the amounts of fertilizers you should add to obtain good plant growth. A soil test also determines the pH of your soil, which is the basis for liming recommendations. For more information about soil testing, see UGA Cooperative Extension Circular 896, “Soil Testing for Home Lawns, Gardens and Wildlife Food Plots.”
Most vegetables grow best in a slightly acid soil, with a pH around 6.0 to 6.5. Vegetables grow very poorly in more acid soil with a pH of 4.5 to 5.5. Dolomitic lime is recommended to neutralize acidity because this form of lime also supplies magnesium and calcium, two plant nutrients that are often deficient in Georgia soils. For best results, apply lime three to six months before planting the crop. A good time to apply lime is in the fall before soil preparation.
Soil Preparation and Improvement
Begin in the Fall
Fall preparations will ensure proper soil conditions for early spring planting. Chop residual litter and turn the soil in the fall, burying the litter in the bottom of the furrow, which helps control diseases and speed up decomposition. Prepare beds or ridge the rows in the fall for cool-season or early spring crops to be planted in January, February or March so the tops of the beds or ridges will dry off for early plantings.
Add Organic Matter
Add organic matter to the soil when possible. It improves soil tilth, conserves soil moisture and helps root development. Organic matter in garden soils decomposes rapidly because of continued cultivation and high temperatures. Making compost is an ideal way to restore this organic matter. Good compost can be made from straw, hay, leaves, manure, sawdust and weeds. See your county Extension agent for information on home composting. Manure, leaves and other materials can also be added directly to the garden and worked into the soil during fall garden plot preparation.

Cover Crops
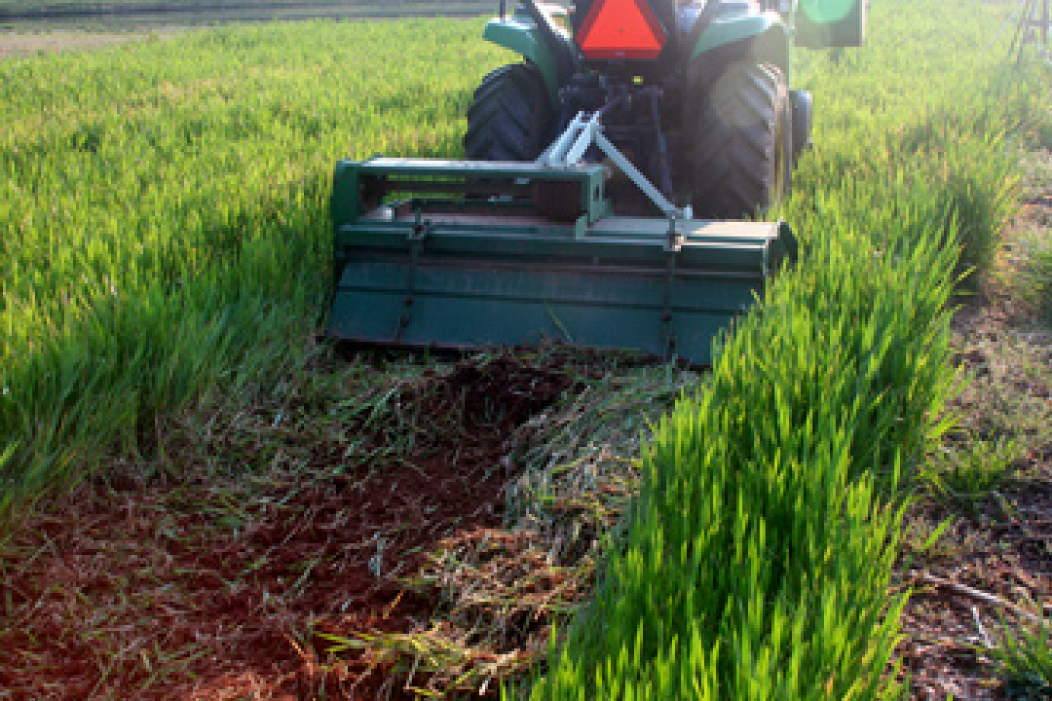
If your garden is large enough, plant part of it with a soil improvement crop such as crimson clover, rye, wheat or vetch each winter. Crimson clover seed may be sown over a part of the garden as the summer vegetables are harvested. The crimson clover seed may be mixed with turnip seed; it will not interfere with the turnips and will make good spring growth after the turnips are used.
If a heavy growth of a cover crop is turned under prior to planting in the spring, it is best apply some form of nitrogen such as nitrate of soda, ammonium nitrate or ammonium sulfate.
Know Your Fertilizers
Fertilizers are sold by their grade (e.g., 6-12-12 or 5-10-15). These numbers refer to the percent of nitrogen, phosphorus and potash, respectively. For example, in 100 pounds of 6-12-12, there are 6 pounds of nitrogen (N), 12 pounds of available phosphorus (P2O5) and 12 pounds of soluble potash (K2O), totaling 30 pounds of plant nutrients. The other 70 pounds consist of other nutrients, fillers and, sometimes, conditioners.
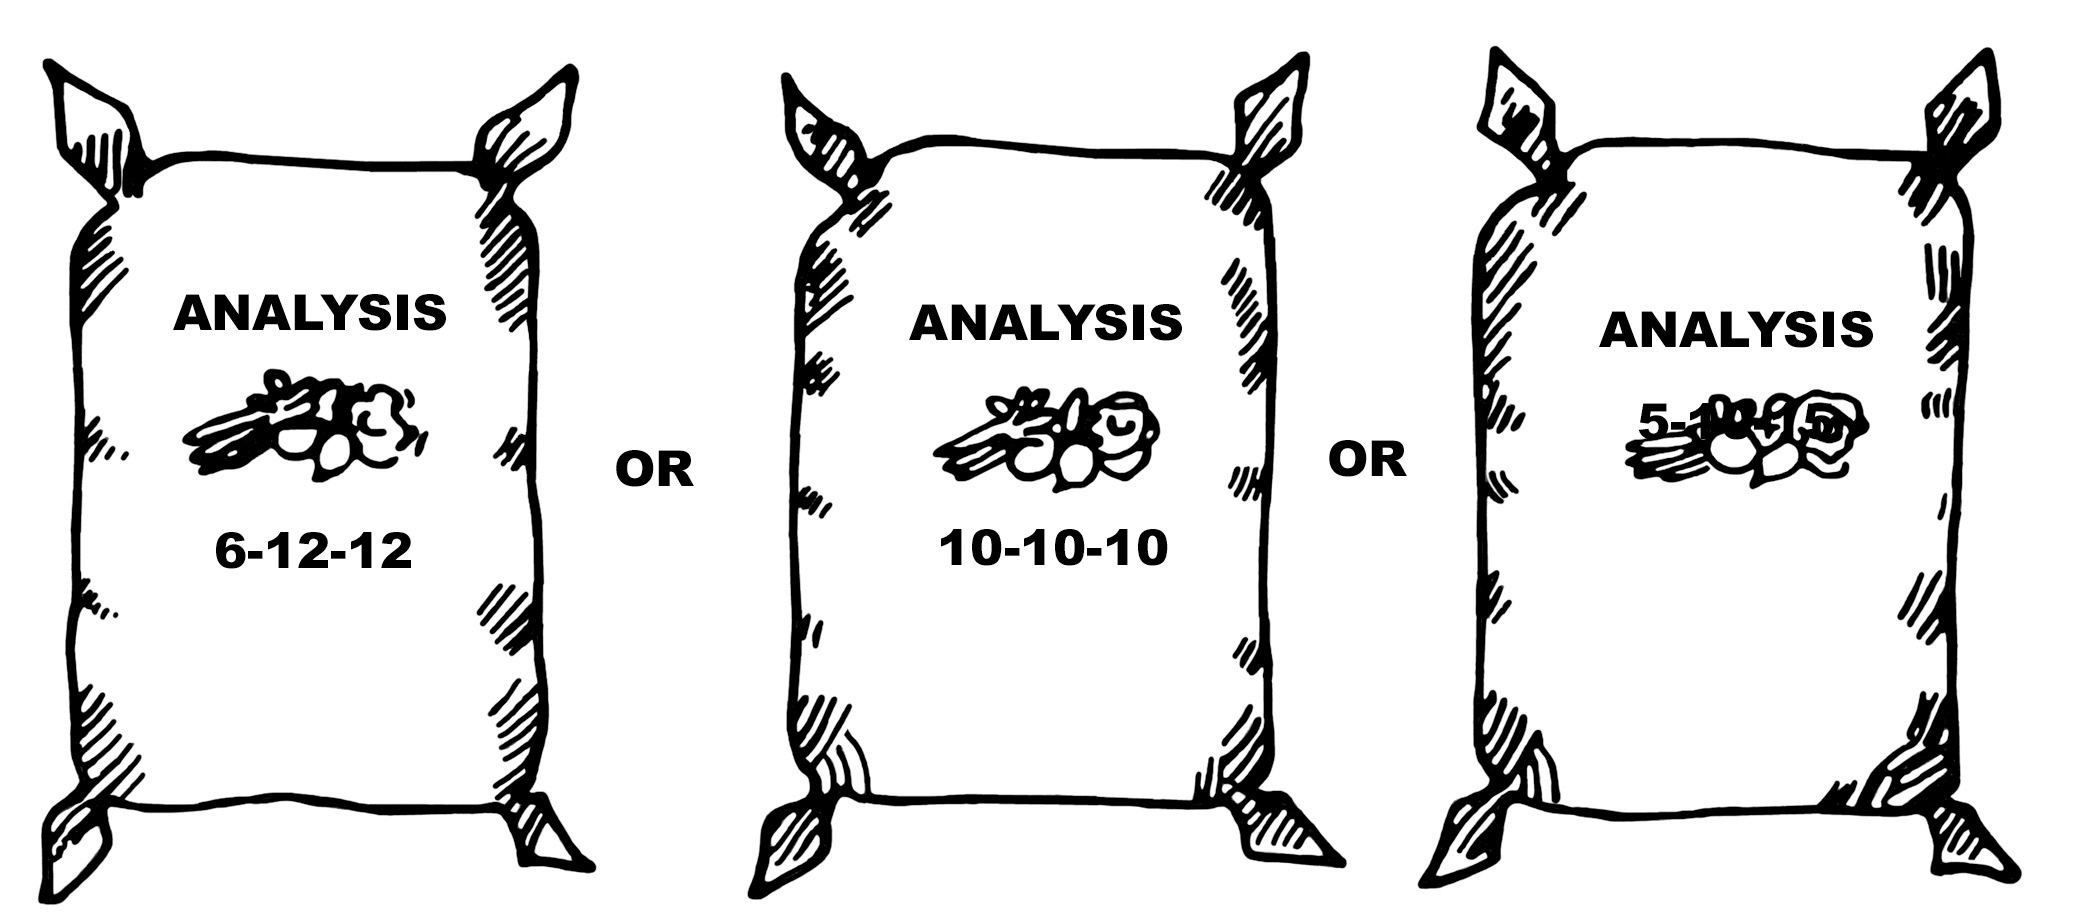 The three grades of fertilizer that work well for most garden crops.
Use a 10-10-10, 6-12-12 or 5-10-15 grade in your garden rather than a specific analysis fertilizer for each vegetable. These three grades give excellent results with most garden crops. Use additional nitrogen as sidedressing for beans, corn, cabbage, collards, turnip greens, cucumbers, squash, lettuce, okra, pepper, eggplant and tomatoes. For peppers and tomatoes, apply the first sidedressing after the first fruits set and repeat at four- to six-week intervals. The amount to use varies with the crop grown and soil fertility.
Vegetables fall into three categories based on their fertilizer requirements. If your garden is large, group crops according to their fertilizer needs to make applications of specific rates easier.
| Heavy Feeders | ||
| Cabbage | Celery | Irish potato |
| Lettuce | Onion | Sweet potato |
| Tomato | ||
| Medium Feeders | ||
| Artichoke | Asparagus | Beans, all |
| Beet | Cantaloupe | Carrot |
| Corn, sweet | Cucumber | Eggplant |
| Greens | Herbs | Okra |
| Peas, English | Pepper | Pumpkin |
| Radish | Rhubarb | Swiss chard |
| Watermelon | ||
| Light Feeders | ||
| Southern peas | ||
The amount of fertilizer you apply to the various vegetables in your garden should be determined by soil test results. Having your garden soil tested enables you to obtain specific fertilizer and lime recommendations for your garden.
Fertilizer Application
Fertilizer may be applied several ways: (1) broadcast all of the fertilizer and work it into the soil prior to planting (this is inefficient for most gardeners); (2) broadcast one-half prior to planting and apply the remainder in 3-inch bands to either side of the row and slightly below the seed level; or (3) apply one-third to one-half of the fertilizer in 3-inch bands (as in number 2) at planting and apply the remainder in two or three sidedressings at two- to three-week intervals after the plants are well established.
Banding a portion of the fertilizer helps get the plants off to a good start. However, applying too much fertilizer or placing it too near the seed or young plants may severely damage the root systems. Because of the small amount of fertilizer required for short rows and small plots, it is easy to apply too much if you do not weigh or measure the amount specified per row. A pint of commercial fertilizer weighs about 1 pound.
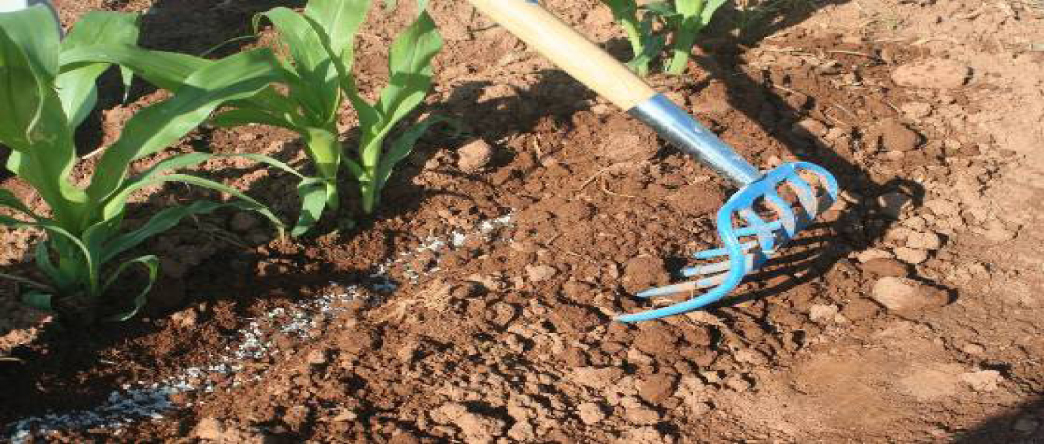
Sidedressing refers to the practice of placing fertilizer in the soil beside your plants to provide additional plant food, which is usually needed during the growing season. Proper sidedressing allows plant food to move gradually into the area around the roots and prevents “burning” of roots or other plant parts that could come into direct contact with the fertilizer.
To sidedress vegetables planted in drills, make a shallow furrow (1 to 2 inches deep and 2 to 3 inches wide) down both sides of the row about 4 to 5 inches away from the plants. Sprinkle fertilizer uniformly into this furrow — usually 200 to 300 pounds per acre are required (see fertilizer table below) -- and then cover the fertilizer by pulling an inch or two of soil into the furrow. For plants such as watermelons, cantaloupes, cucumbers and pumpkins, which are planted in widely-spaced hills, form a circular furrow 4 to 5 inches from the plants and follow the same general directions.
| Approximate amount (in pints) of fertilizer per 100 feet | |||||||
| lbs/A* | 12” Rows | 18” Rows | 24” Rows | 30” Rows | 36” Rows | 42” Rows | Per 100 sq. ft. |
| 100 | 1/4 | 1/3 | 1/2 | 2/3 | 3/4 | 1 | 1/4 |
| 200 | 1/2 | 3/4 | 1 | 1 1/4 | 1 1/2 | 1 3/4 | 1/2 |
| 300 | 3/4 | 1 1/4 | 1 1/2 | 1 2/3 | 2 1/4 | 2 1/2 | 3/4 |
| 400 | 1 | 1 1/2 | 2 | 2 1/2 | 2 3/4 | 3 1/2 | 1 |
| 500 | 1 1/4 | 1 2/3 | 2 1/2 | 3 | 3 3/4 | 4 1/4 | 1 1/4 |
| 1000 | 2 1/2 | 3 3/4 | 5 | 6 | 7 1/2 | 8 1/2 | 2 1/2 |
| 2000 | 5 | 7 1/2 | 10 | 12 | 15 | 18 | 5 |
| 2500 | 7 1/2 | 11 1/4 | 15 | 18 | 22 1/2 | 27 | 7 1/2 |
| *1 pint of the average mixed fertilizer will weigh about 1 pound. | |||||||
Prepare Soil Early
If you did not plow or spade the garden soil in the fall, turn the ground in the spring as soon as it is dry enough to work. To see if the soil is dry enough, mold a handful of soil into a ball. If the ball is not sticky but crumbles readily when pressed with the thumb, the soil is in good condition to be worked.
Plow or spade the soil to a depth of 7 or 8 inches. Turn under as much organic residue such as manure, leaves, compost and old straw as possible. If you need to turn under a large amount of undecomposed organic matter, sprinkle some form of nitrogen such as ammonium nitrate over it before turning it under. This technique speeds up decomposition and provides nitrogen for both soil organisms and plants.
Harrow or rake spring-plowed or spaded soil soon after turning it to maintain good soil texture and prevent excessive drying. It may be necessary to harrow again just before planting to ensure good soil conditions. For small-seeded crops, a finely pulverized surface ensures easier planting, better germination and a more even tand.
Planting the Garden
Plant on Schedule
Planting a garden is more than a one-day job. Schedule each planting, then follow your schedule as closely as possible. Plant turnips, lettuce, cabbage, English peas, carrots, beets and Irish potatoes far ahead of the frost-free date. Plant tomatoes, peppers, eggplant and okra after all danger of frost has passed. See UGA Cooperative Extension Miscellaneous Publication 117, “First and Last Frost Dates in Georgia.” To prepare for summer and fall vegetables, continue planting as early-maturing crops are harvested. The planting chart below lists approximate planting dates.
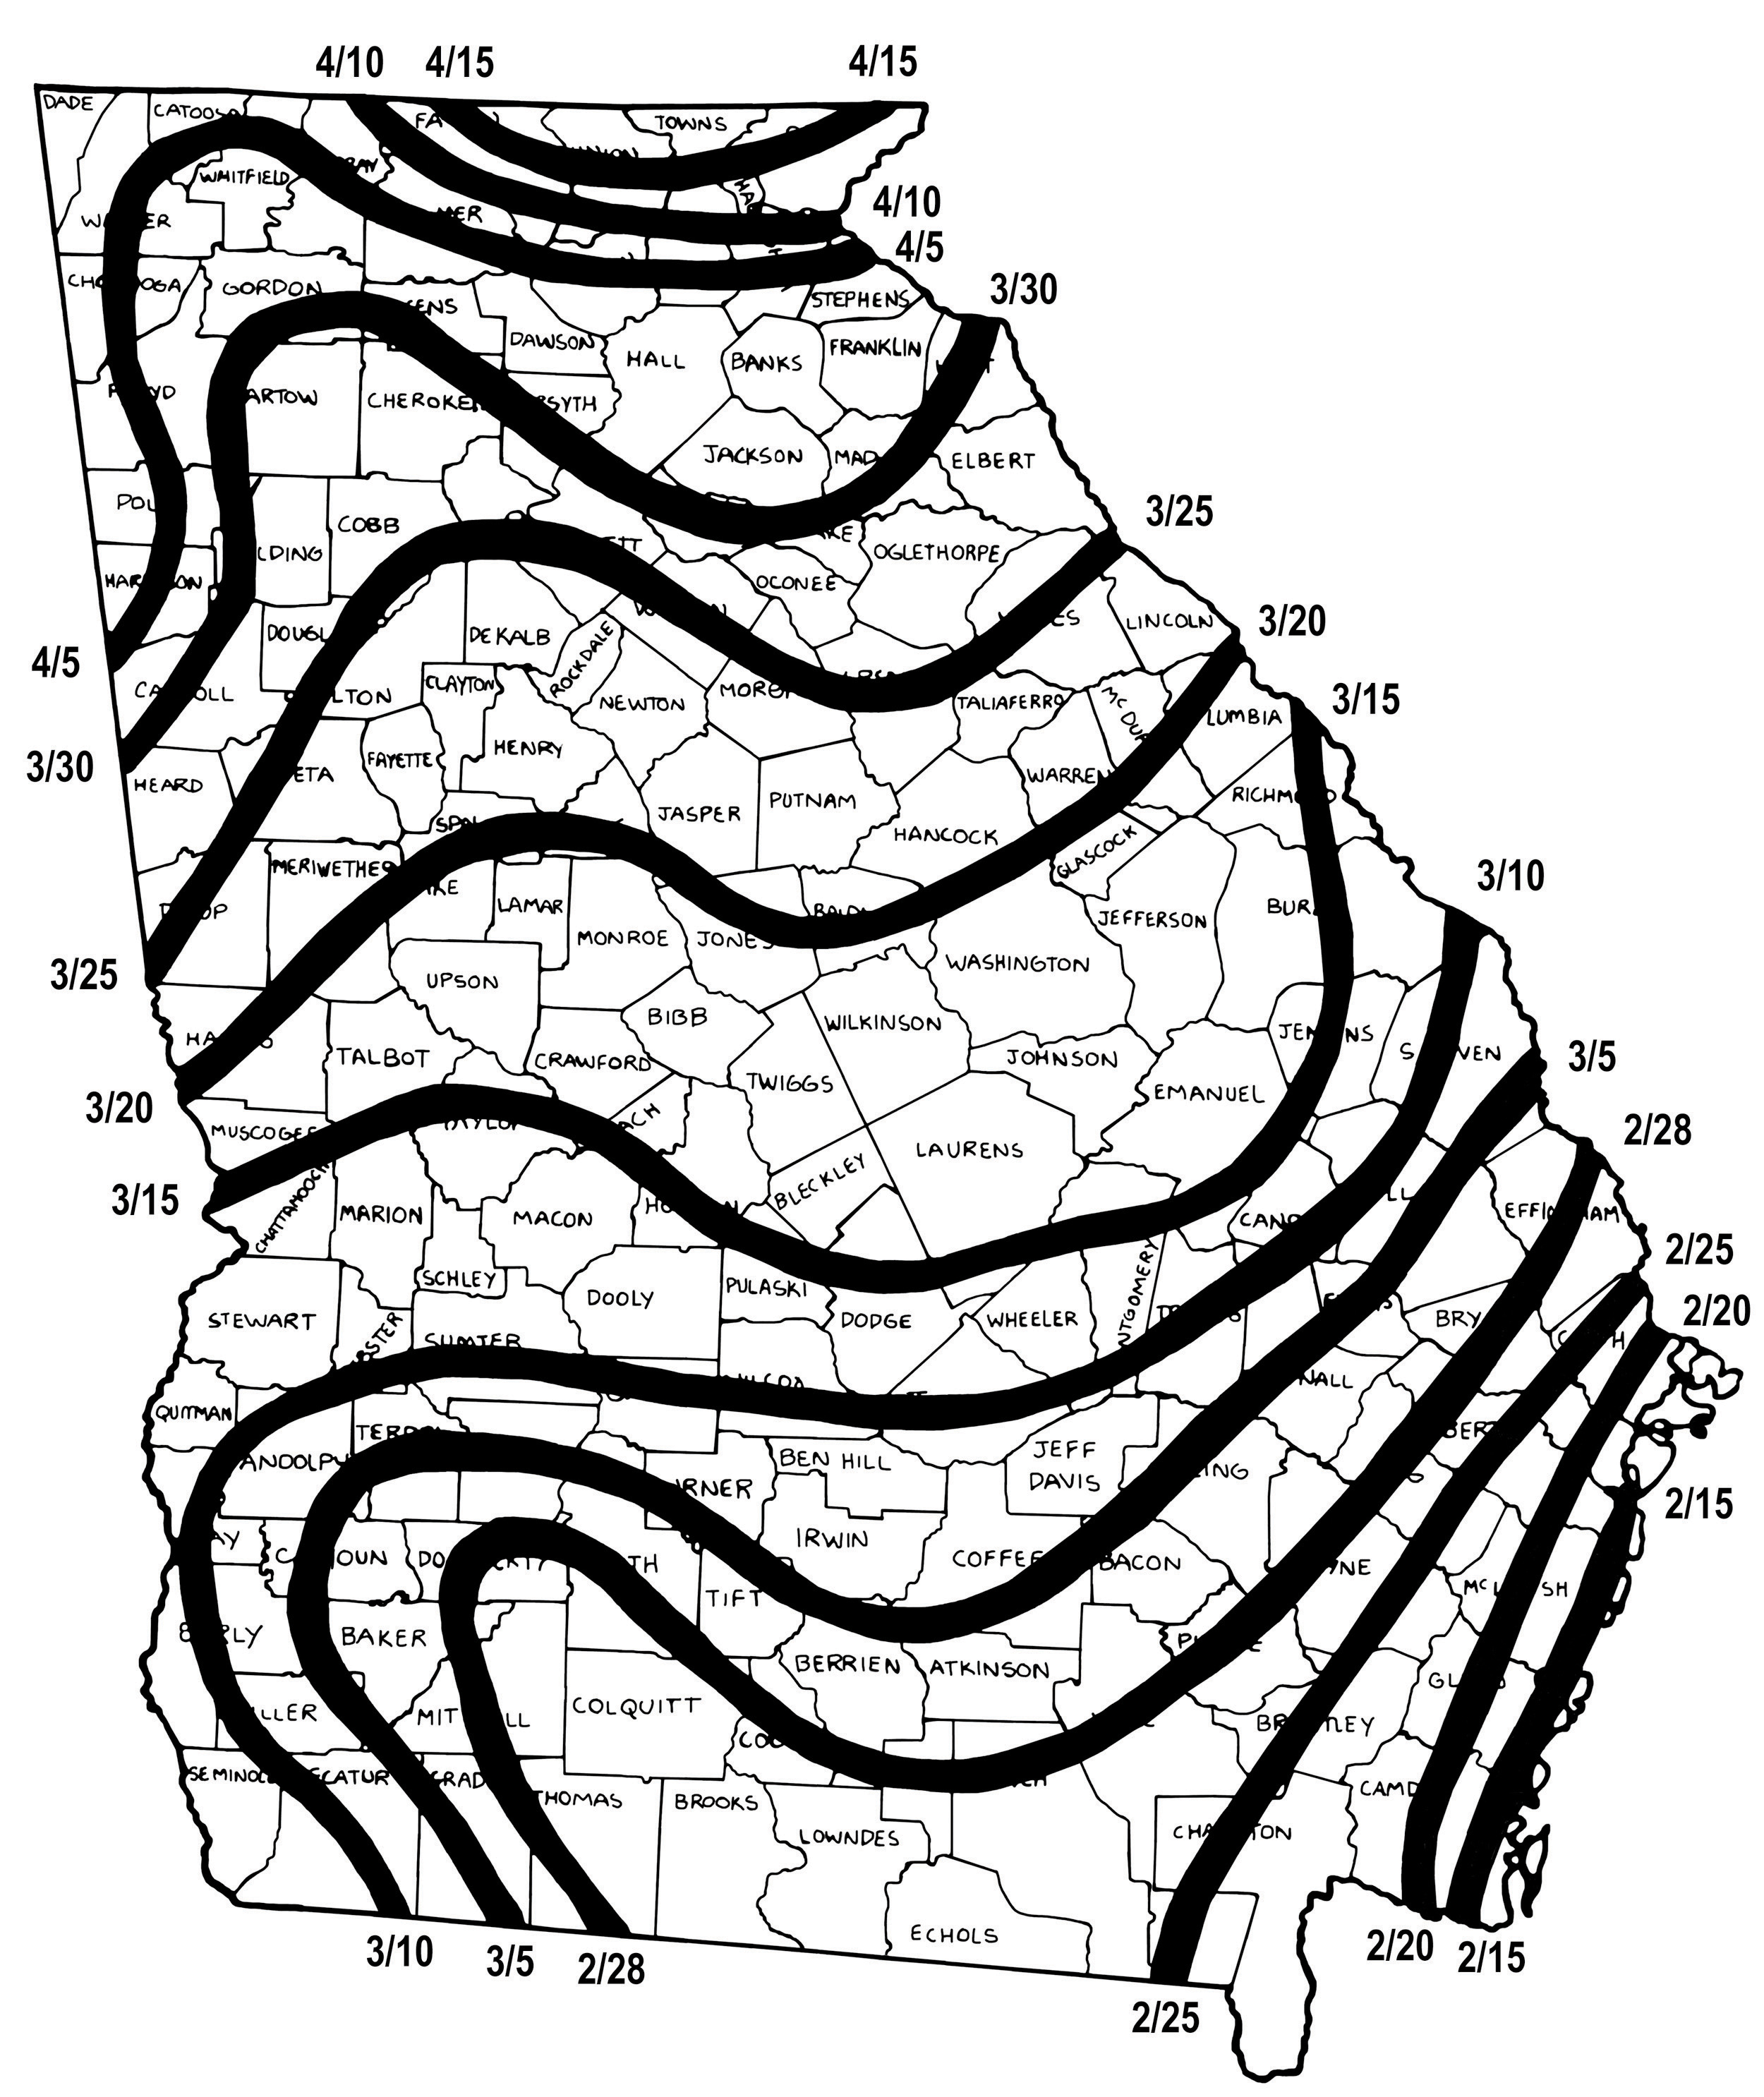 Average dates of the last 32-degree F temperature in the spring.
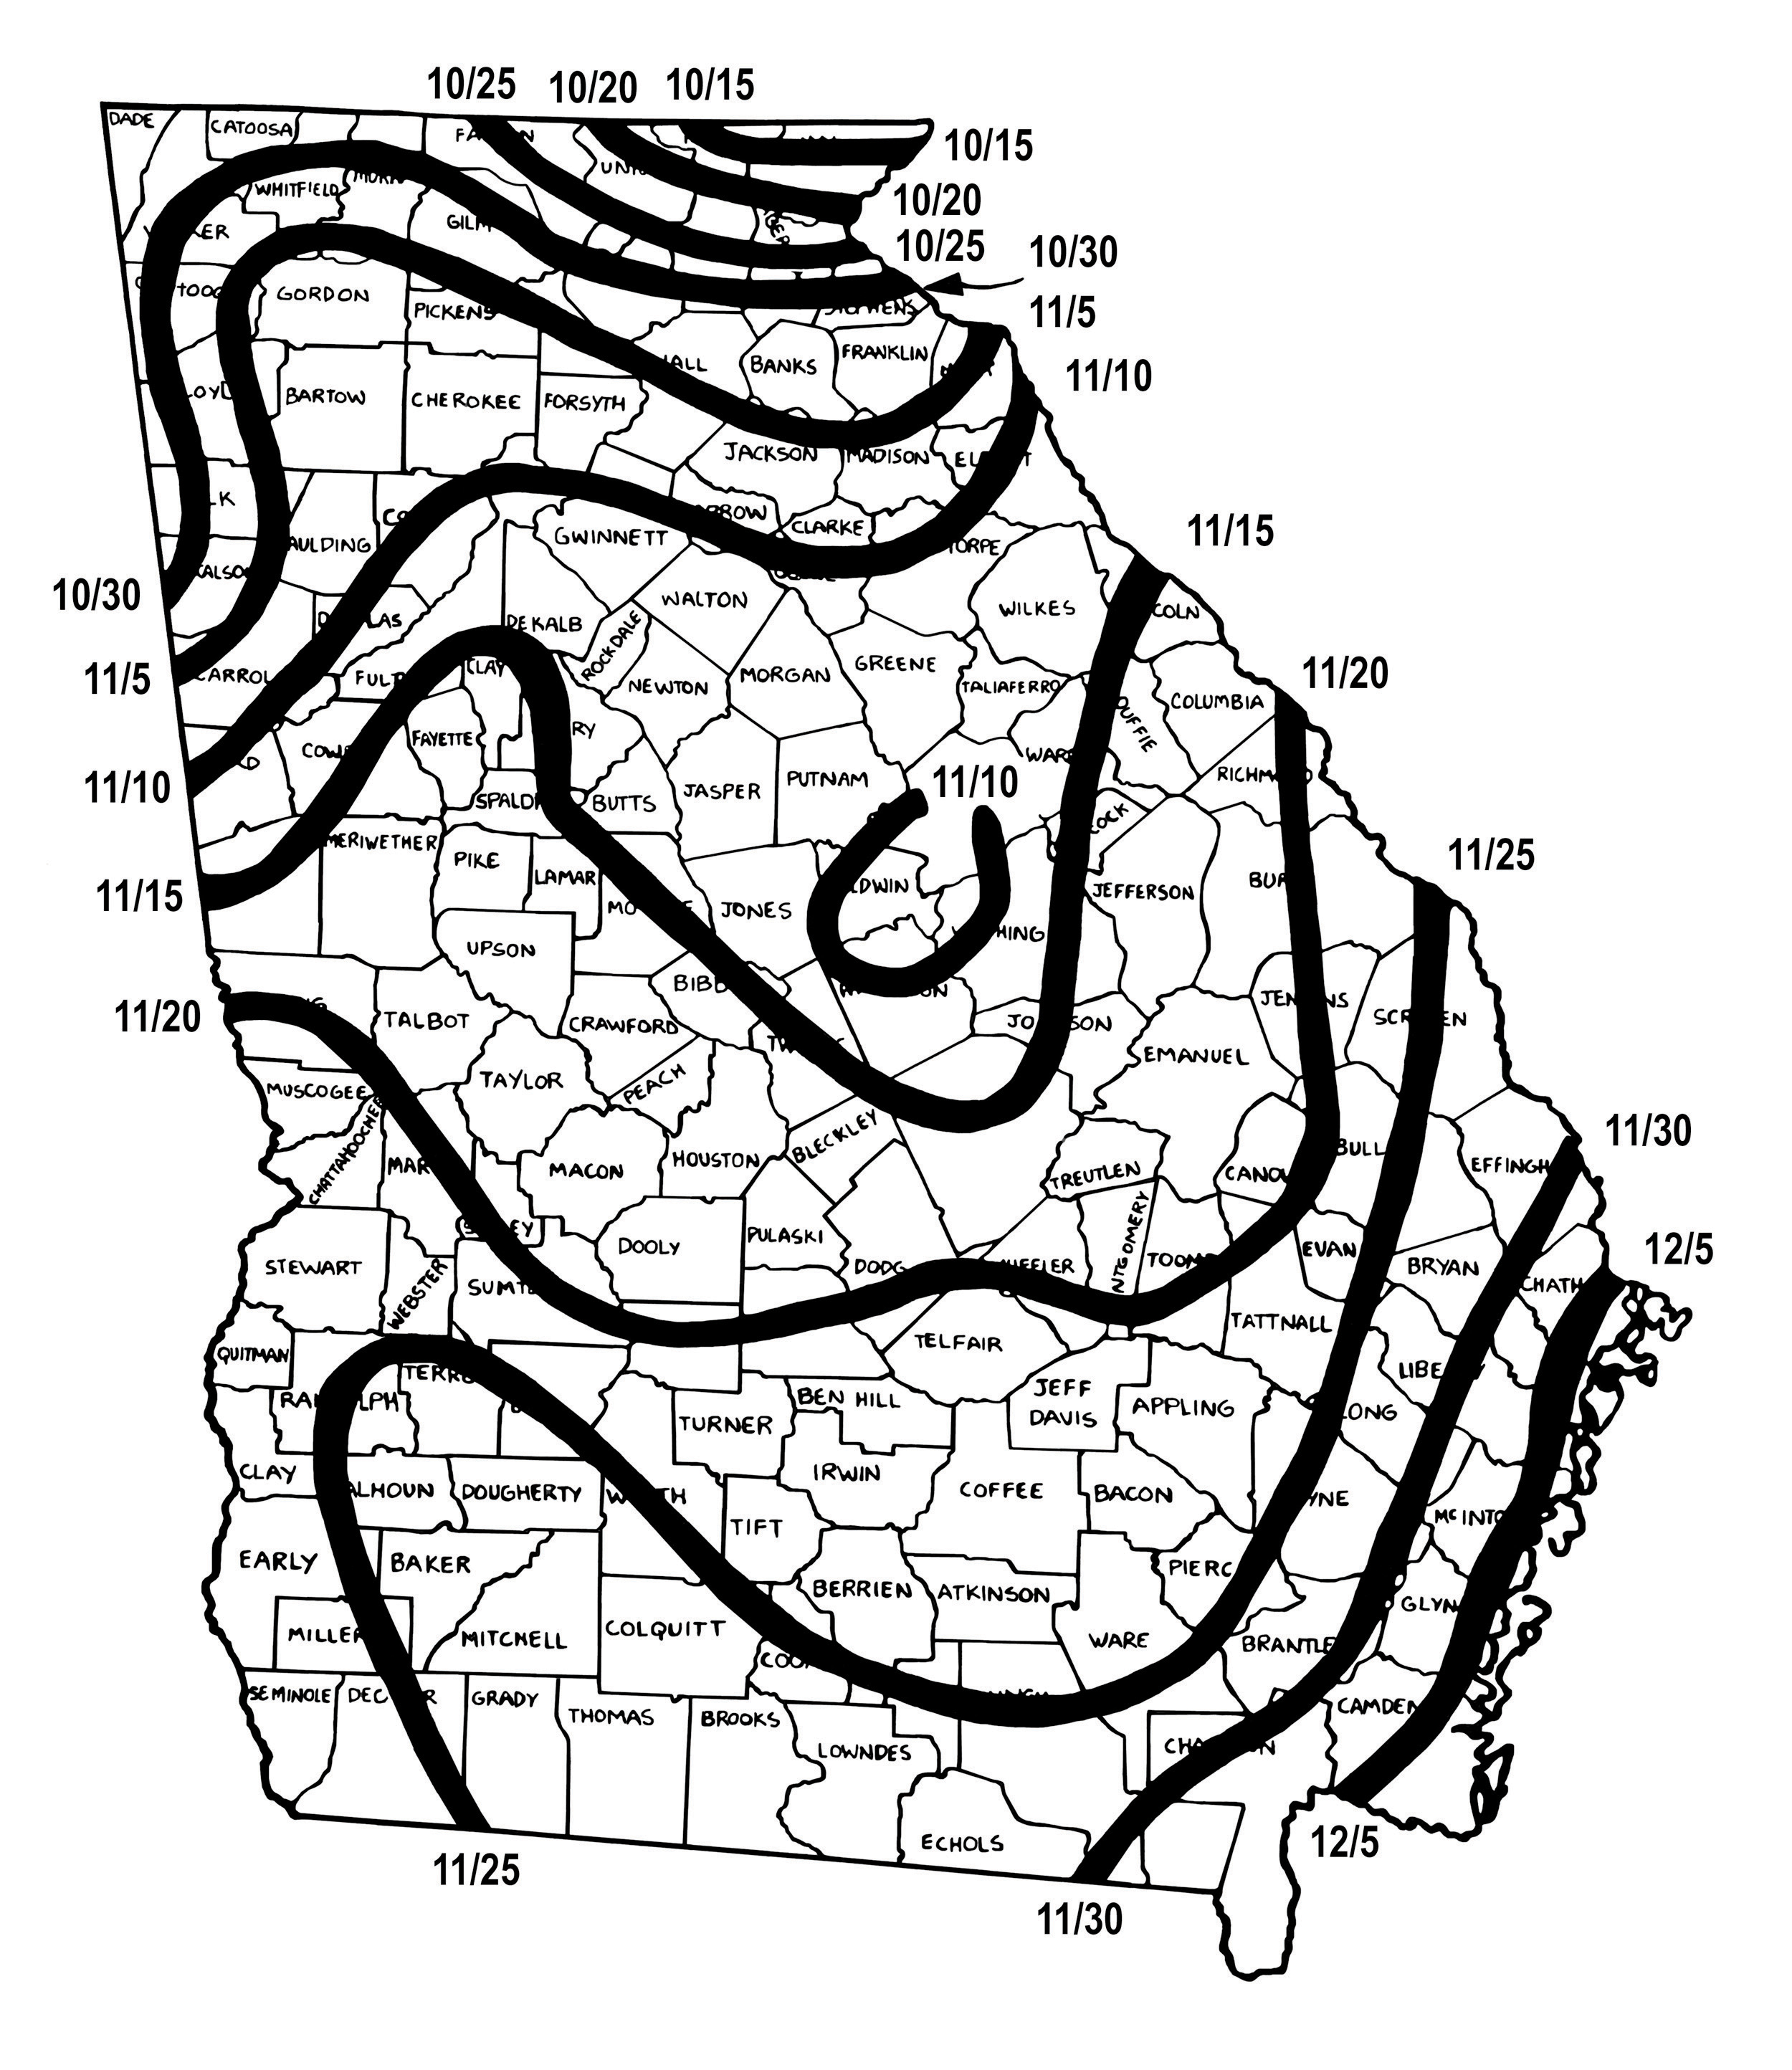 Average dates of the first 32-degree F temperature in the fall.
Marking the Rows
Most gardeners find it helpful to use a heavy cord stretched the length of the row to aid in planting. By using four stakes and a piece of string or cord twice the length of the garden, the gardener can mark off two rows at once and save considerable time. Row width varies according to the types of vegetables planted. Check the chart below for recommended row widths, spacings and planting depths.
Most crops are best planted in drills, although some widely-spaced crops such as squash and melons may be easier to cultivate and care for if they are planted in hills. A drill is a single row of plants spaced more-or-less evenly. A hill is a cluster of plants, not a mound of soil.
To open a row to plant large-seeded crops such as beans, peas and sweet corn, use a small plow to make a furrow, or walk backward, stepping on the cord and dragging the corner of the hoe blade along the string. For small-seeded crops, the end of the hoe handle works fine, although some gardeners use a planter for this job. A number of small, push-type planters are available that do a good job of planting most vegetable seeds.
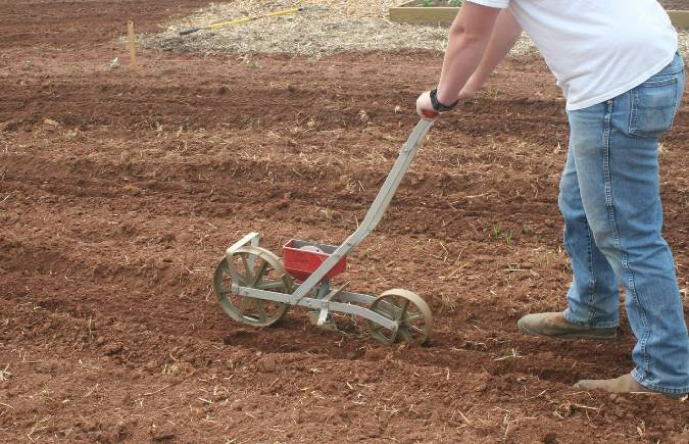
Always firm (but do not pack) the soil around the seed with the flat blade of the hoe, the wheel of a garden plow or your foot. When planting in very dry soil, it is a good idea to water the area to ensure germination. If drought conditions continue, more water may be needed in a few days.
Always sow seed a little thicker than the plants will finally stand. This practice will allow for those seed that fail to sprout and for plants that may be killed when they are very young. Even with seed that have a high percentage of germination, there will be some that won’t sprout. Blackbirds, crows, cutworms and diseases can also cause a poor stand. When the plants are well-established, thin out extra ones so they will not be crowded. Do the thinning early, before the plants get too tall and spindly.
Use a layer of straw mulch ½ to 1 inch thick on top of beds planted to very small seed. The mulch prevents packing of the soil around the seeds when they are watered and protects the young seedlings when they first emerge. A mulch is especially helpful during drought periods when repeated watering may be necessary to get good germination and seedling emergence.
Transplant Healthy Plants
Whether you buy your plants or grow them, many vegetables produce earlier and better crops from plants started in protected beds or boxes and then transplanted to the garden. Growing good, healthy plants is difficult, but it can be done with good seed, clean soil and careful attention to heat, light, moisture and ventilation. Set out only healthy, disease-free plants, and transplant them immediately after they are pulled from the plant bed. After planting, water them thoroughly to settle the soil around the roots and exclude air. After the water has penetrated the soil completely, cover the wet surface with dry soil.
Protect Plants
Use small pieces of brush or other available material to shade plants until they are well established.
To keep rabbits and other animals from destroying the garden, place chicken wire around the garden to a height of 24 to 30 inches. Repellents can also be effective at keeping larger critters such as deer out of the garden. See UGA Cooperative Extension Circular 889-2, “Using Milorganite® to Temporarily Repel White-Tailed Deer from Food Plots,” for more information.
If there is danger of frost after the plants are set, invert a basket or a specially prepared hotcap made of waxed paper over each plant. Hotcaps serve as miniature cold frames, and many kinds of seeds can be planted under them. After the plant is established and danger of frost has passed, cut open the hotcap. On warm, sunny days, cut holes in the sides of the hotcap to provide ventilation. See UGA Cooperative Extension Circular 872, “Winter Protection of Ornamental Plants” for more information.
Weed Control
Weeds compete for moisture and fertilizer, and must be controlled by cultivating, mulching or using herbicides. Using herbicides in the home garden is difficult and not generally recommended since no single herbicide can be used for all crops and the amount used is critical. Too much may injure or kill the desired crop while too little won’t kill anything. Accurate application equipment is a must but is not usually available for the home gardener. Contact your county Extension agent for more information about using herbicides. Label recommendations must be followed precisely to get the desired results safely.
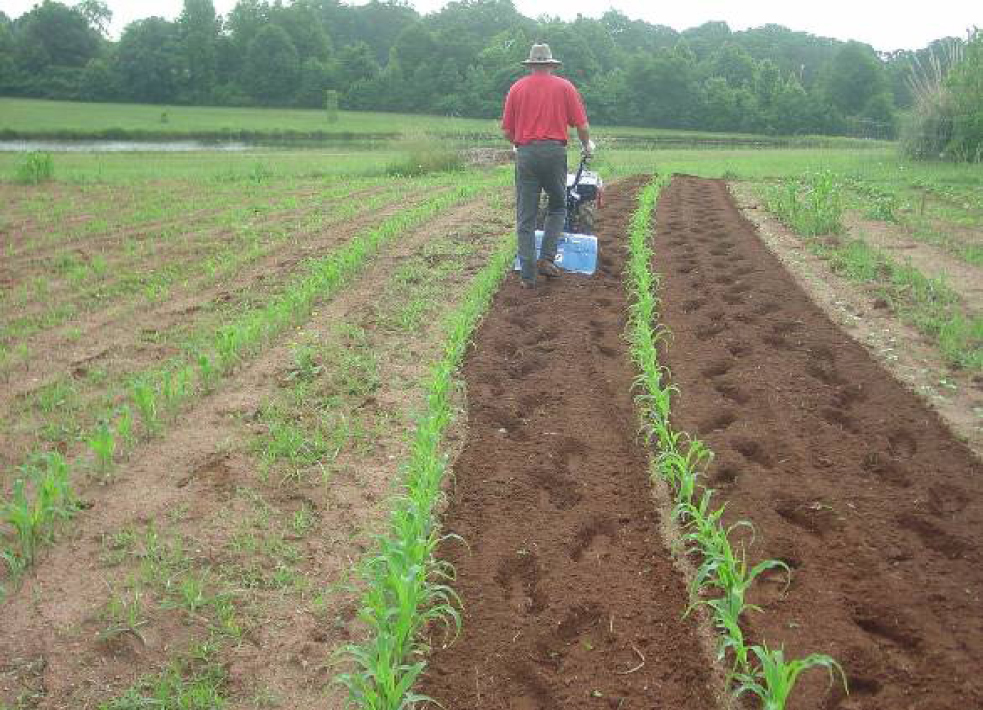 Cultivate shallowly. Deep cultivation cuts off roots and increases soil moisture loss.
Cultivate Early
Start cultivation in the garden soon after the plants are up. Early cultivation will help give the plants a quick start. Remove weeds that will use up fertilizer and moisture and choke out young vegetables.
Cultivate Shallowly
Use a sharp hoe or a cultivator equipped with knife-type blades that skim just under the surface. There is no need for deep cultivation, which often causes more moisture loss, cuts roots and requires more labor. A tiller can also be run down rows shallowly to cultivate weeds.
Cultivate Often
Cultivate young plants often to keep weeds from getting a start. If a garden soil is properly prepared and is in good physical condition, the only benefit derived from cultivation is weed control.
Mulching
A mulch of straw, dried lawn clippings, leaves or pine straw will help conserve moisture, keep down weeds and keep un-staked tomato, cucumber and bush squash fruit from coming in contact with the soil. To be effective, mulch must be applied between the rows and around the plants, and should be about 2 to 4 inches deep after it has settled. Do not apply mulch to the garden too early in the spring before the soil has warmed up. Mulch will block the sunlight and the soil will remain cool and retard early plant growth. Wait four weeks after setting transplants before applying mulch.
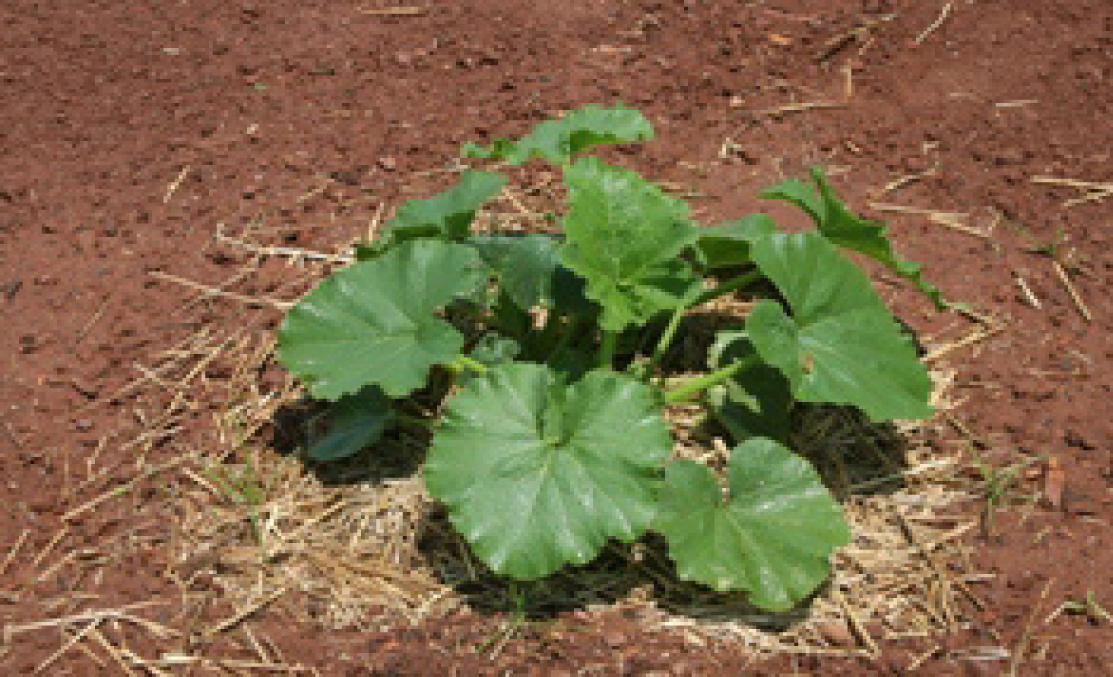
The mulch material can be raked off after the gardening season and re-used, or it can be spread over the area and worked into the soil. If you add decomposed material to the soil, use some nitrogen fertilizer on the surface before spading it under.
Watering
How much water your garden needs will vary depending on soil type, stage of growth of the plants, amount of rainfall and temperature, but most vegetable gardens require about 1 to 1½ inches of moisture per week during the growing season. Water often enough to keep the moisture level fairly uniform. On medium and heavy soils, an application of about 1 inch per week should be adequate in the absence of sufficient rain. On light sandy soils, two or three ½-inch applications per week may be needed.
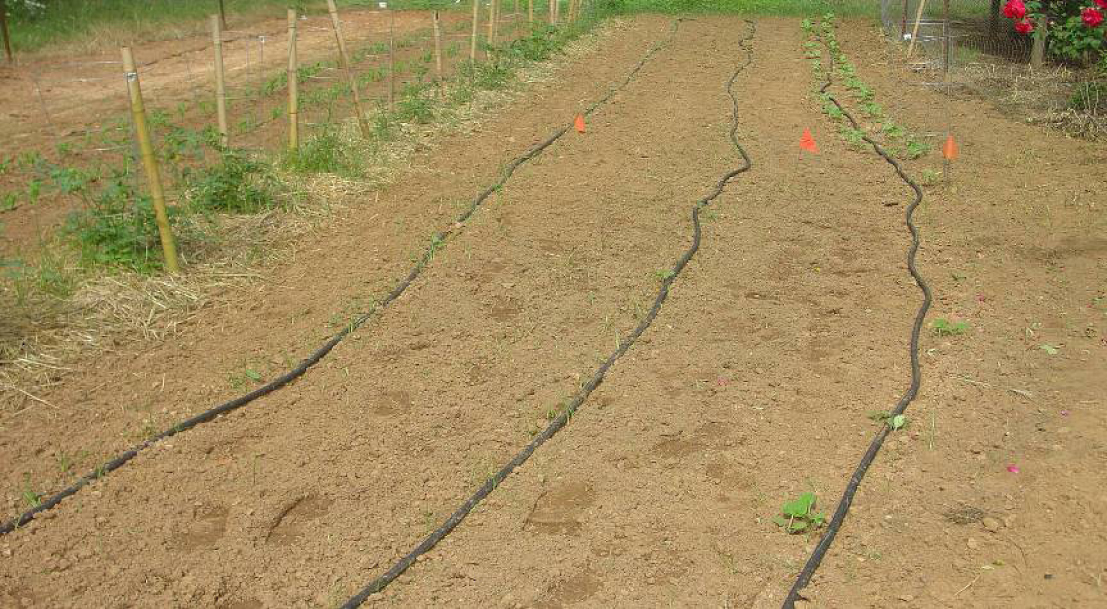
If the ground is sufficiently level, run water in the furrows until the soil is completely soaked. If the soil is very sandy or the surface is too irregular, use sprinklers or a porous irrigating hose. Keep in mind, however, that any watering practice that wets the foliage increases disease damage, especially if the foliage remains wet for extended periods. If you use sprinklers, water the garden in the early morning or at night so the foliage does not stay wet during the day. Over-watering not only wastes water but also leaches fertilizer below the root zone, making additional fertilizer necessary.
Pollination
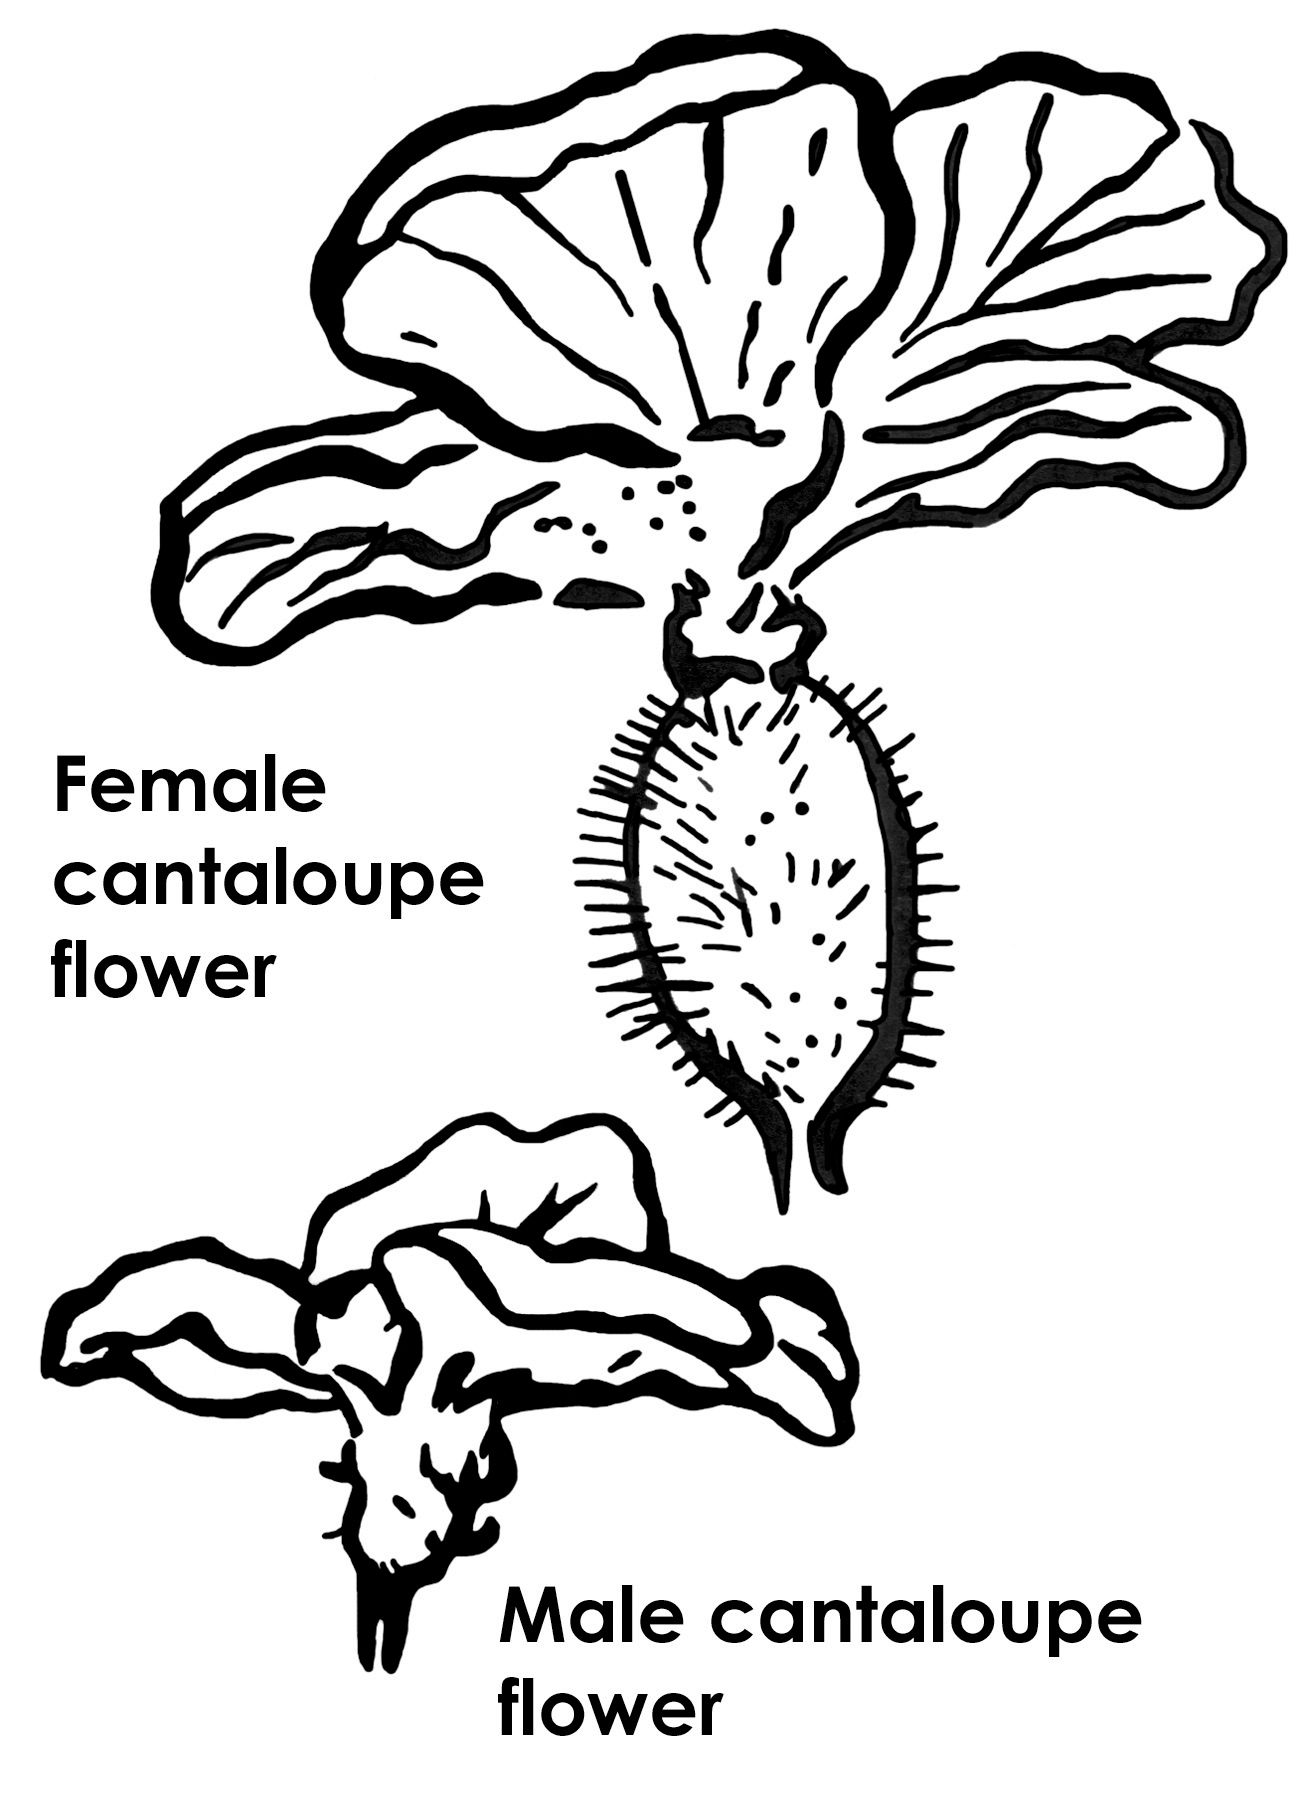
Cucumbers, cantaloupes, pumpkins, squash, watermelons and gourds bear male and female flowers on each plant. The female flower is usually easily recognized because a “miniature fruit” (ovary) is visible at the base of the flower petals.
Pollen must be transferred from the male flower to the female flower for normal fruit set and growth to occur. Because the pollen of these plants is sticky, it is not windblown. Sufficient numbers of bees must visit your garden to carry out the pollination process. If you use chemicals in your garden, follow directions carefully and apply them late in the afternoon to avoid killing bees and other beneficial insects. See UGA Cooperative Extension Circular 934, “Pollination of Vegetable Crops,” or Bulletin 1349, “Beyond Butterflies: Gardening for Native Pollinators,” for more information.
Cultural Tips
Planting dates, spacing and depth are given in the chart below for most vegetables. Additional information on specific crops follows:
Asparagus
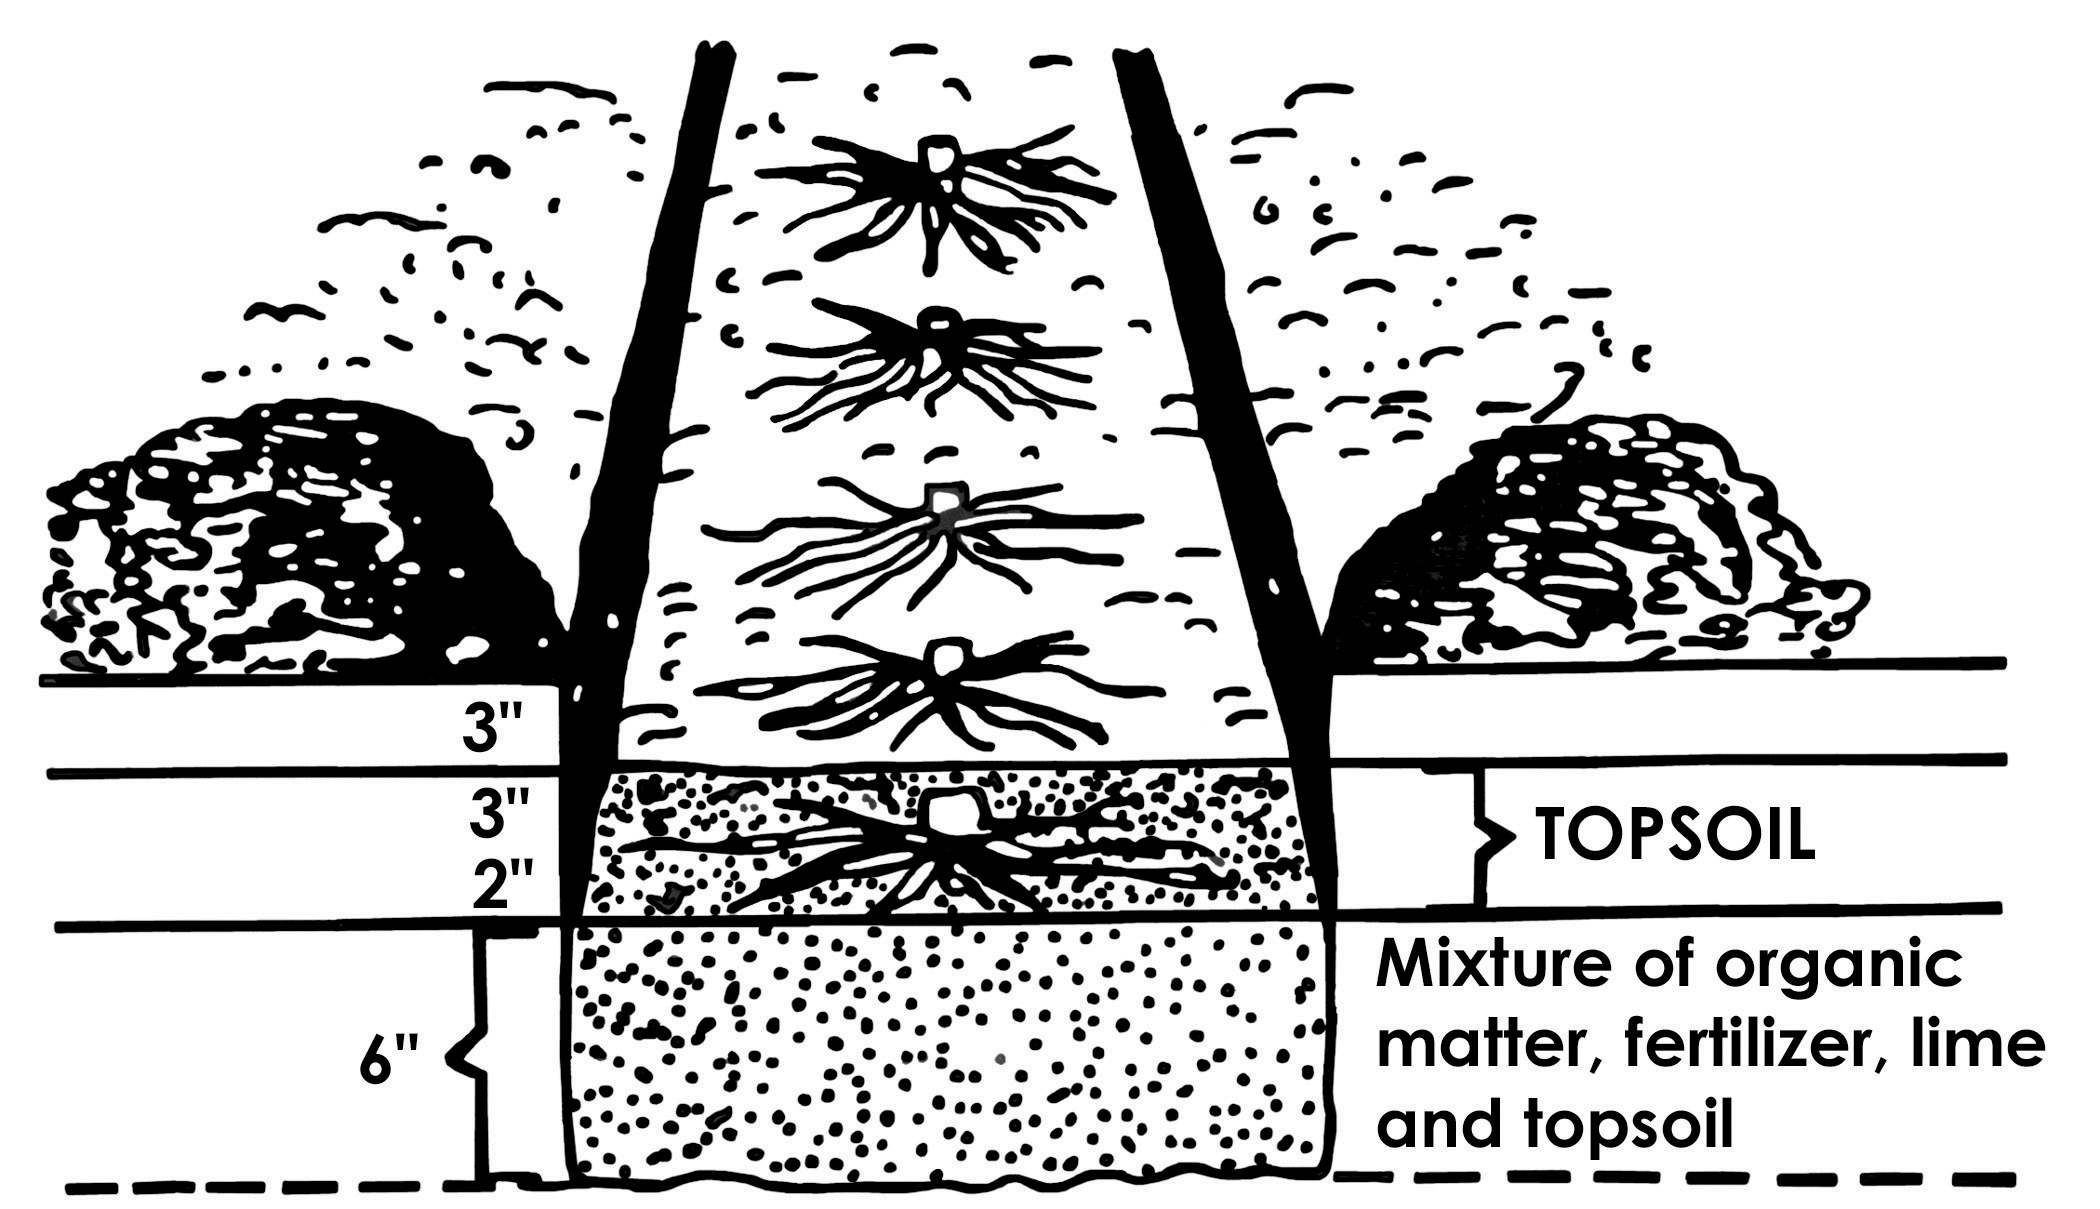 Furrow method for transplanting asparagus crowns; the plant in the foreground shows the crown’s position after being covered with soil.
Asparagus is among the earliest of the spring vegetables. It requires more soil preparation than most other garden crops, but the extra effort is rewarded with good yields of a superior vegetable. Prepare the soil correctly and a planting will be productive for years.
- Open a furrow 14 inches deep and 18 inches wide. Keep the topsoil and discard the subsoil. Make rows 4 to 5 feet apart. In areas where topsoil is shallow, bring in additional topsoil from another area.
- Spread a 2-inch layer of compost, manure, peat moss or well-rotted leaves in the bottom of the furrow. Add 4 inches of topsoil. Next, add 10 pints of 5-10-15 or 8 pints of 6-12-12 fertilizer and 10 pints of agricultural limestone for each 100 feet of row. Mix thoroughly. Warning: Use proportionately less fertilizer and lime if the furrow is smaller than 14 inches by 18 inches.
- Add 2 inches of topsoil over the prepared mixture.
- Place the crowns in the furrow 12 to 18 inches apart, taking care to spread the roots out evenly. Cover the crowns with 3 inches of topsoil. (Note: Crown transplants should be at least a year old.)
Remove no shoots the first year. If good growth is made the first season, spears can be cut during the second season for up to 14 days without harming the vigor of the roots. Remove all shoots during the cutting season in subsequent years. Remove and burn the dead tops in the fall.
Beans: Snap, Bush and Pole
Green beans are well-adapted to most gardens. Begin planting about the time of the last spring frost. Successive plantings can be made for several weeks to prolong the harvest season. Fall beans can be planted in July or early August. Bush or half-runner types are the easiest to grow, but pole beans offer superior quality for those who make the extra effort to stick or string them. Stringing can be accomplished by any of the following methods:
- Place a 6- to 7-foot stake by each hill;
- Put a post at each end of the row with wire about 5 to 6 feet high going from post to post, and run strings from the base of the plant to the wire;
- When space is limited, plant pole beans in a circle 6 feet in diameter to make a “teepee”; put a 7- to 8-foot pole in the center of the circle and run strings or stakes from the plants to the top of the post.
Beans, Lima
Lima beans or “butterbeans” can be grown about the same time and same way as snap beans. Several harvests can be obtained if the crop is properly cared for and harvested before the beans reach maturity.
Broccoli
Broccoli is an excellent crop for the home garden and can be grown as both a spring and a fall crop. General cultural practices are about the same as for cabbage. Plants may not be available when needed, so it’s best to plant seeds in flats or cold frames about six weeks before they are needed.
Cabbage
Cabbage is a cool season crop that can be grown in both the fall and early spring. Space medium-head varieties 12 inches apart in the row. Space large-headed types such as Rio Verde about 8 to 10 inches apart if small to medium heads are desired.
Cauliflower
Cauliflower requires a cool season and can be grown in both the spring and fall. It is best to plant the seed indoors six weeks before you will be able to set out plants for the spring crop. To bleach the heads, pull the leaves up and tie them over the curd (head) when the curd reaches the size of a golf ball. New self-blanching varieties may not require this practice.
Collards
Collards will withstand wide ranges of temperatures if they are properly conditioned. They may be direct-seeded and thinned to the desired spacing or plants may be set out. Collards are a very popular crop in Georgia, and it exceeds cabbage, turnip greens and spinach in protein, fats and carbohydrates. Collards may be harvested by cutting the whole plant or by “cropping” individual leaves. The latter method allows the plant to keep growing for future harvest.
Cucumbers
Select cucumber varieties according to use. Some varieties are more suited for pickling, and others are better as fresh or salad cucumbers. Spring and fall crops may be grown. When space is limited, cucumbers may be trellised, which increases the yield and protects the fruit from soil rots. Bees are needed to pollinate cucumbers, so don’t spray insecticides while the bees are active.
Lettuce
A small packet of seed will usually supply enough lettuce plants for 100 feet of row. The seed can be sown directly in the soil and thinned, or the plants can be grown indoors, in a cold frame or in a hotbed. Plants that are pulled when thinning out can be transplanted. Plant seed as early as soil can be worked. It takes about four to six weeks to grow plants.
Try some lettuce in the fall garden as well as in the spring garden. Plant seed in late summer for the fall crop. The fall planting of head lettuce should begin about the last week in July and not much later than the first week in August in the mountain area. The planting date can be much later in southern counties.
Okra
Okra is a very tender crop and does not do well if planted before the soil warms up. It can be carried through the summer if it is kept fertilized, watered and properly picked. See UGA Cooperative Extension Circular 941, “Growing Okra in the Home Garden,” for more information.
Peas: English or Garden
One pound of seed will plant 100 feet of row. Space the seed about 1 inch apart and 1 inch deep in rows spaced so they can be cultivated. Peas can be seeded in double rows 7 inches apart with 18 inches between the double rows. When using double rows, keep the surface raked lightly to control weeds until the seed emerge. With a variety like one of the Thomas Laxton strains, the plants can be pulled when the pods are ready and carried under a shade tree where the pods can be pulled off. With these varieties, the pods are nearly all ready at once.
Plant peas from January until March, depending on the area of the state. The soil for this crop can be prepared by ridging in the fall, which will allow the surface to dry for early planting. This crop will not withstand hot weather, so early planting is important.
One bushel of pods will make about 5 quarts of shelled peas for canning or freezing.
Pepper
Many different kinds of peppers can be grown in the garden, including bell, banana, hot and pimento. It is best to have plants ready to set out as soon as the danger of frost is over.
Onions
Green bunch onions are usually grown from sets or plants, which will require 6 to 8 weeks to reach eating size. Space sets and plants about 2 inches apart. Large, mature onions may be direct-seeded in south Georgia in September or October, or plants may be set out in November or December. The onions will reach maturity in May. In north Georgia, set out plants in early or middle March.
When the plants start to mature (usually when about ¾ of the tops have fallen), use a broom or rake to break over those still standing so all the onions will mature thoroughly. When all the tops are dead, pull the onions and spread them in the sun for a day or two to dry. Place the tops over the bulbs to prevent sun scald. After they are dry, cut off the tops an inch above the bulbs and store in slatted crates or mesh bags in a shed where air can circulate.
Potatoes: Irish
Cut the seed so each piece has one or more good eyes. Each piece should weigh 1½ to 2 ounces. Space the seed pieces 8 to 10 inches apart, firming them into the soil. Cover the seed with 3 to 4 inches of fine soil. Rake the surface occasionally to kill any germinating weed seed before the sprouts emerge.
Water is critical when blossoms are forming and should be added if the soil is very dry. Ridge some soil around the base of the vines to cover the tubers and prevent greening soon after blossoming or if growth is very heavy before blooming. See UGA Cooperative Extension Circular 849, “Potato Production in the Home Garden,” for more information.
Squash
Summer squash is a tender vegetable that can be grown throughout the summer and eaten at an immature stage of growth. There are a number of varieties, including yellow crookneck, yellow straightneck, scallop and zucchini. Like cucumbers, bees must pollinate squash.
Winter squash, such as acorn, butternut and hubbard, can also be grown throughout the summer, but it is harvested and eaten when the fruit is mature. It has a hard rind and can be stored for use throughout the winter. Some squash are bush while others are vining types that need more space per plant.
Sweet Corn
Sweet corn is adapted to all areas of Georgia. By selecting varieties with different maturity dates, harvest can be extended over a longer period. To get top quality, sweet corn must be harvested at just the right stage of maturity, called the “milk stage.” At this stage, kernels are not fully mature and are still smooth. They remain in this stage for only a few days before getting too hard. After harvest, the quality is lost rapidly; corn should be eaten, refrigerated or processed as soon as possible. See UGA Cooperative Extension Circular 905, “Growing Home Garden Sweet Corn,” for more information.
Tomatoes
Tomatoes are very popular as a garden vegetable. Plants may be set out two or three weeks before the last frost if proper protection is provided. Otherwise, do not set out before the last killing frost. There are two types of tomato, different in growth habit.
Determinate tomatoes set one crop, usually over a four- to six-week period. When all the fruit is harvested, the plants die.
Indeterminate types continue to grow as long as conditions are favorable. The indeterminate type is used when tomatoes are staked for harvest throughout the summer. The individual tomato plant may be pruned to one or two main stems and tied to a stake, or it may be enclosed in a wire cage, which supports the plant and keeps it upright. Pruning is not required for the cage method.
Tomato blossoms are very sensitive to temperature. If the temperature stays at 55° F to 60° F, pollination is very poor and very few fruits form. Temperatures of 90° F to 95° F (common in the south) are also unfavorable for pollination.
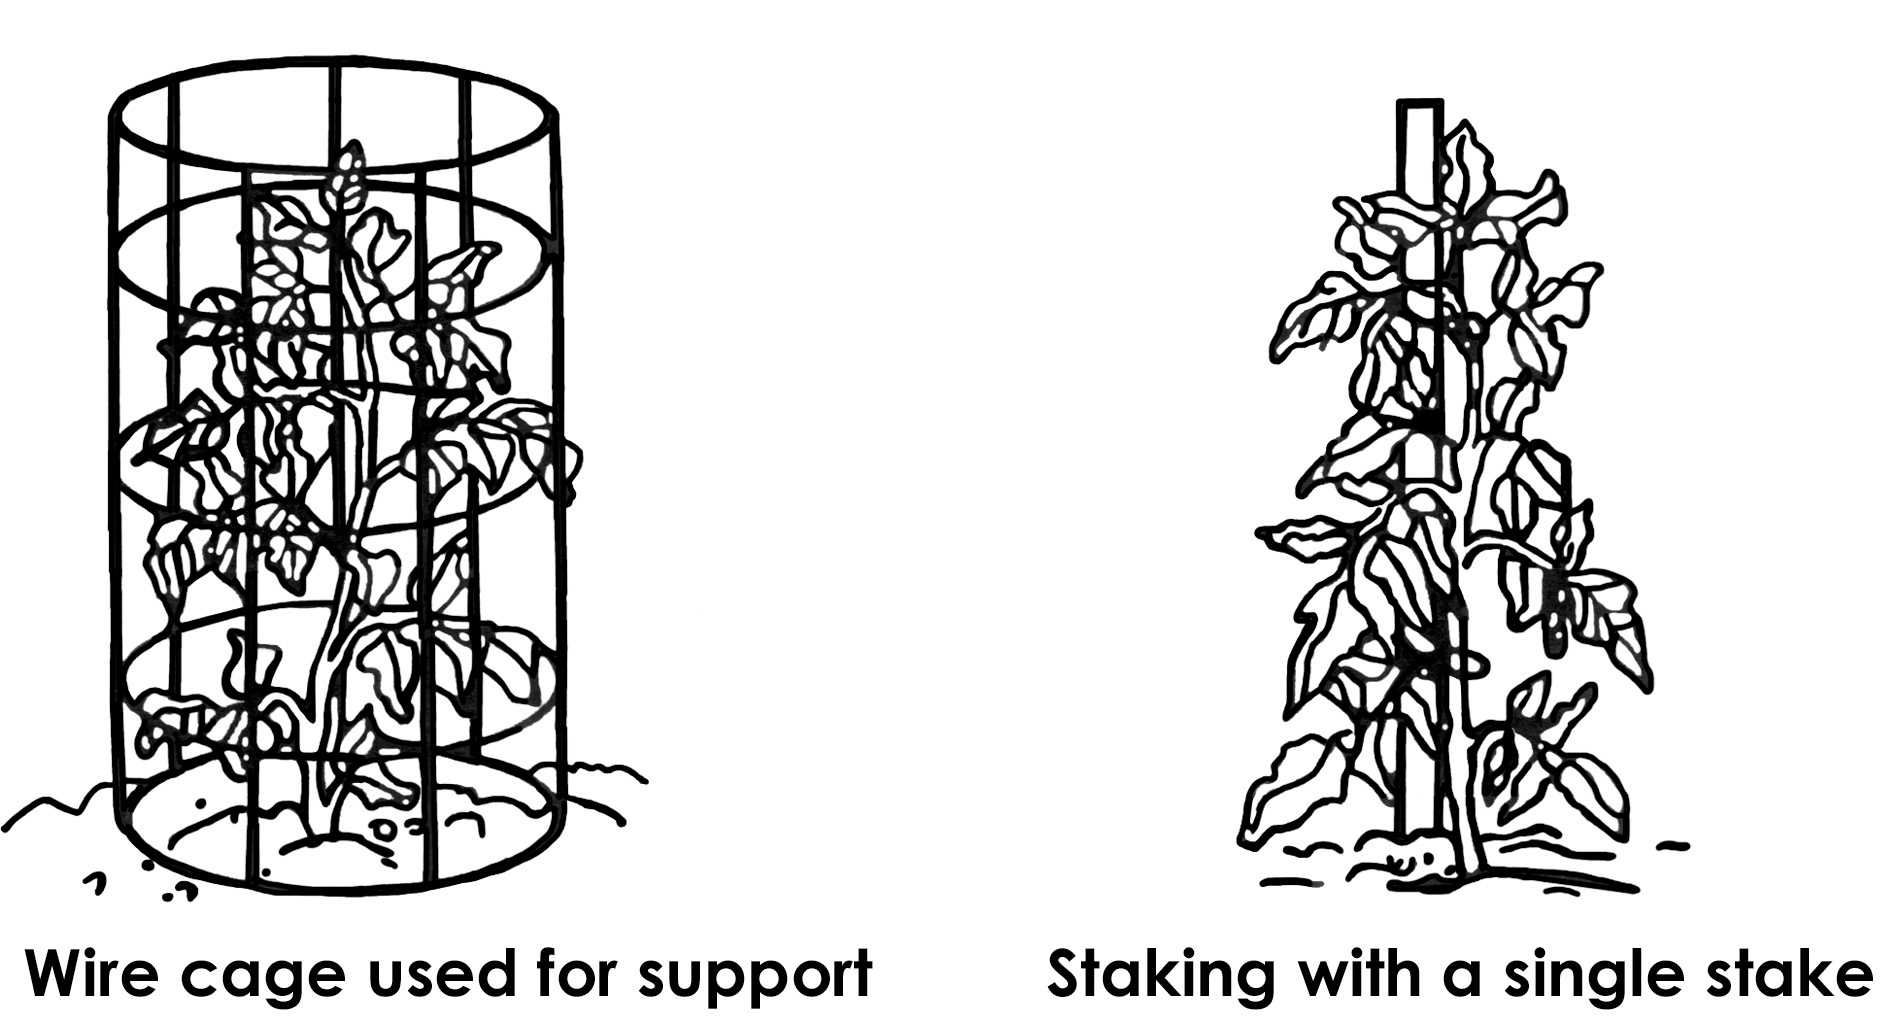 Use a wire cage (L) or a single stake (R) for support.
The tomato plant also requires a good moisture supply. Mulch the soil around the plants with several inches of straw, old hay, sawdust or black plastic to keep down weeds, keep the soil temperature uniform and decrease surface evaporation of water. Use a nitrate topdressing over the mulch and water it in.
Blossom-end rot can be a serious problem for tomatoes. To prevent this disorder, maintain a pH of 6.0 to 6.5 and an adequate calcium level by liming. Keep moisture levels fairly uniform (not too wet or too dry), and use a nitrate source of nitrogen. Blossom-end rot may be corrected by spraying with calcium chloride (2 ounces in 3 gallons of water or 2 tablespoons per gallon) twice weekly until the condition is corrected. For more information, see UGA Cooperative Extension Circular 938, “Blossom-End Rot and Calcium Nutrition of Pepper and Tomato.” For more information about home-garden tomatoes in general, see UGA Cooperative Extension Bulletin 1272, “Georgia Home Grown Tomatoes.”
Garden Herbs
A number of herbs can be used to good advantage in cooking. They not only add flavor to food but many of them are very attractive as ornamental plants. Most of them require very little attention after they are established. For more information on herbs, contact your county Extension agent, or see UGA Cooperative Extension Bulletin 1170, “Herbs in Southern Gardens.”
Disease and Insect Control
Diseases
Many foliage- and soil-borne diseases (including nematodes) attack vegetables and must be controlled or prevented to obtain good yields and high quality. Good horticultural practices should produce stronger plants that tend to be less susceptible to diseases and make the use of chemical controls less necessary. For example, avoid watering late in the day because wet foliage contributes to disease problems. Contact your county Extension agent for descriptions and control measures.
Insects
Some insects you are likely to encounter include aphids (plant lice), cutworms, tomato fruitworms, pickleworms, wireworms, spider mites, Mexican bean beetles, leafhoppers, corn earworms and the Colorado potato beetle. In the home garden, regular inspection and good horticultural practices may cut down on the need for chemical controls of these pests. Check the entire plant, including the underside of the leaves, for evidence of pests. Contact your county Extension agent if you suspect an outbreak and for specific and up-to-date information about garden insect control.
Harvest High-Quality Produce
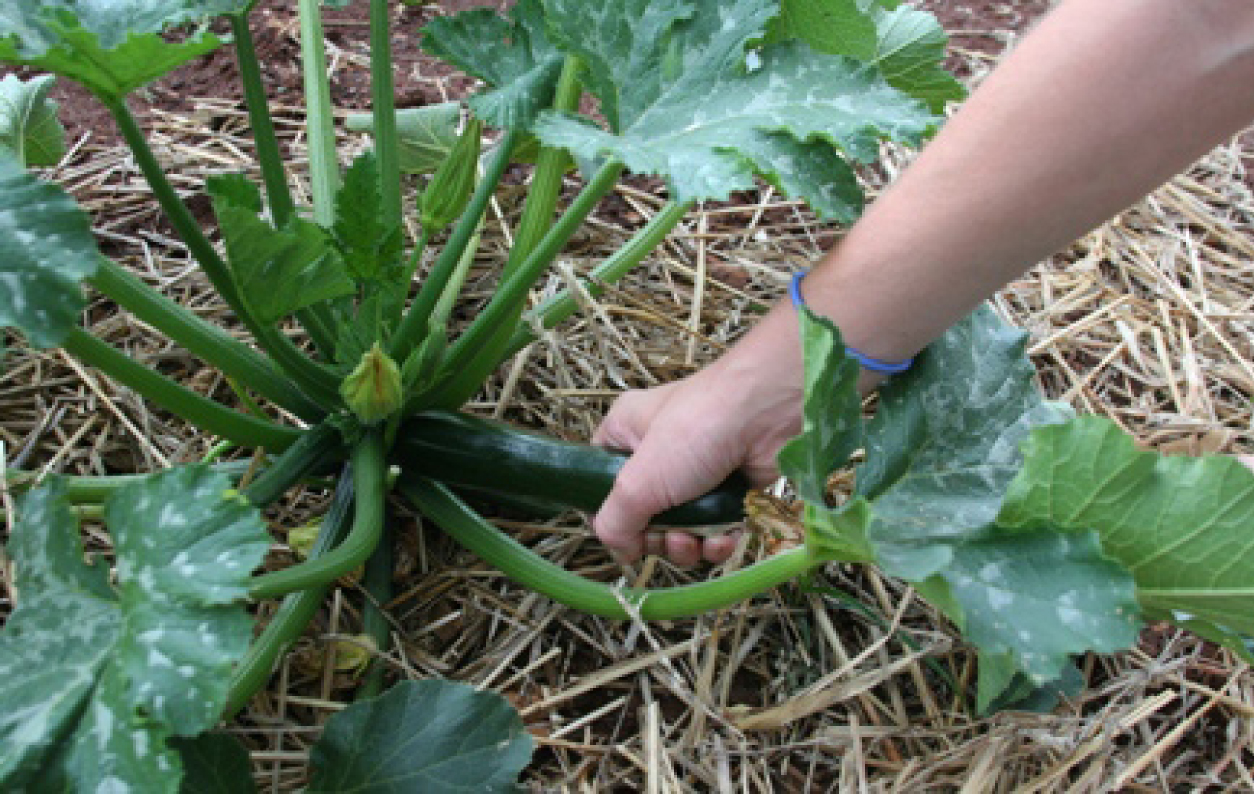
Keep the following points in mind when harvesting vegetables:
- Harvest at the proper stage of maturity, not before or after; most crops can be harvested several times if only the ready part is harvested.
- Harvest on time. Okra, for instance, must be harvested every two or three days or some pods will grow too large and become tough and unusable, a condition that may alter future production.
- Harvest when the foliage is dry. Tramping through wet foliage scatters disease spores and helps spread diseases.
- Don’t damage foliage by stepping on vines or breaking stems, which creates a wound through which disease organisms can enter the plant tissue.
- Don’t harvest when the plant is wilted. Wounds made by harvesting cause water loss. This condition can increase water stress inside the plant and lead to further damage.
- Move freshly harvested produce immediately into the shade and keep it cool to preserve quality. The quality of some products such as green beans deteriorates rapidly after harvest unless the pods are kept cool.
- Use freshly harvested produce as soon as possible after harvest to preserve quality. Harvest only what you can use or preserve immediately.
- When harvesting, gently remove the part to be harvested from the plant, taking care to prevent unnecessary injury to the plant. Injuries weaken the plant, cause wounds for disease attack and reduce future yields.
Storing, Canning and Freezing
Why not extend the joy of a garden year-round? Some vegetables are easily kept through the winter in prepared storage, in a cellar, or in a basement.
Basement Storage
Dry, well-ventilated basements with a relatively even temperature of 40° F to 60° F can be used for storing onions, pumpkins and squash. Use cool basements for storing carrots, celery (heeled-in in sand), parsnips and Irish potatoes. Turnips and rutabagas, unless kept thoroughly covered with sand, give off odors that might be transmitted to the house.
Canning and Freezing
Most vegetables that cannot be stored for prolonged periods may be preserved for future use by canning or freezing. Canning and freezing should be done as soon as possible after harvest to ensure top quality. Select only good-quality vegetables for preserving. For information on canning or freezing vegetables, contact your county Extension agent or see UGA Cooperative Extension Bulletin 989, “So Easy to Preserve.”
For a Successful Garden ...
- Locate it near the house in full sunlight.
- Plan it carefully.
- Use recommended varieties.
- Prepare the soil thoroughly.
- Fertilize according to recommendations.
- Plant on schedule.
- Control weeds, insects and diseases.
- Use a mulch.
- Water thoroughly when needed.
- Can, freeze or store some produce for later use.
Download the Planting Chart as a PDF
Originally authored by Wayne McLaurin and Darbie Granberry, Extension Horticulturists
Status and Revision History
Published on Mar 01, 2002
Published on Feb 26, 2009
Published on Sep 16, 2009
Published with Full Review on Jan 14, 2013
Published with Full Review on Mar 28, 2017
Published with Full Review on May 29, 2020
Published with Full Review on Mar 29, 2022
